The garage. If you find that something doesn’t have a place to go in the house, this is normally where it will end up. This can take over your garage before you know it! This doesn’t have to be the case though. With some organizing tips and solutions you can reclaim your garage.
This was the case with us recently. We were remodeling our basement and as we cleaned everything out, it ended up in our garage. The result was total chaos and mess. My husband and I decided to tackle it one weekend and the result was amazing!
Other organizing ideas:
- How to Easily Organize Kids School Paper, Photos and Artwork
- How Long You Need to Keep Important Documents (And How to Store Them)
- 21 Days to a More Organized Home
Before you begin, you might want to print out the checklist for this project. Click the image below to find out how you can get your copy.
HOW TO ORGANIZE THE GARAGE
Make sure you have enough time set aside to do this job. To be honest, my husband and I spent about 1/2 of the day on a Saturday and a few additional hours on a Sunday afternoon to get this done (so probably 8 – 10 hours). The length of time it will take depends upon how much you have to clean out and how big your garage space is.
Remove everything from the garage and set it out on the driveway and/or lawn
(That means you need to make sure there is no chance for rain that weekend).
Clean the garage floor
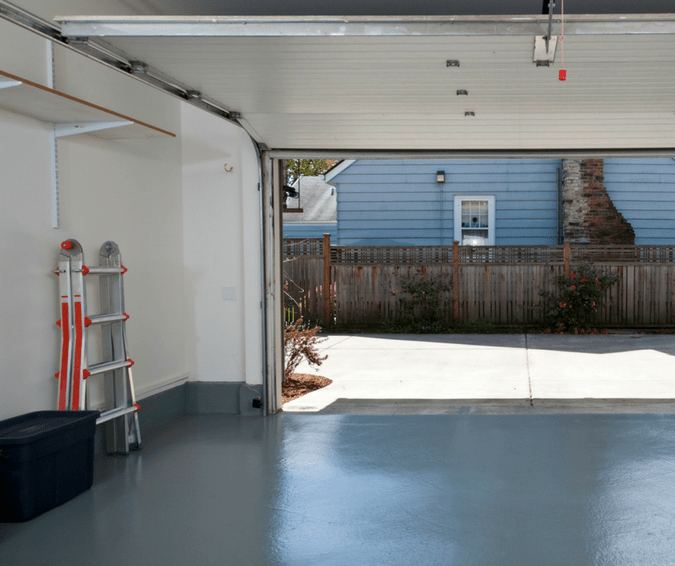
We chose to power wash our floor to remove all of the grime. However, you can simply sweep it out and might want to even just use a garden hose to clean up any messes.
Also, take the time to sweep out the corners where there are old (and maybe even new) cobwebs hanging out. Having a clean space, makes it simpler to get your garage organized.
Add organization spaces
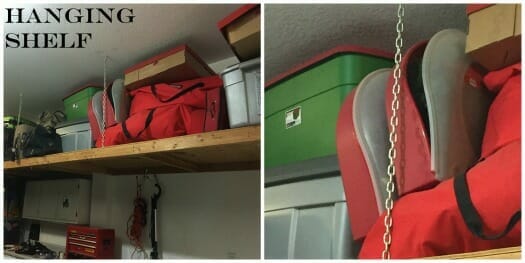
We purchased two hanging shelf racks from The Home Depot. They were not cheap (but of course, I got a deal on them). They attach to the studs of your ceiling and you can adjust not only the height but the width. This is ideal for storing things such as luggage, coolers, camping gear, etc.
My husband also built a floating shelf across the back wall of our garage. This is also a great way to get those items up off of the floor and just turn wasted space into useable space. This is a basic idea of what you can create (or contract to have one made for you).
We went bigger with ours and used lag bolts and chains so that it could extend the width of our garage. That means you can turn whatever space you find into full, useable space.
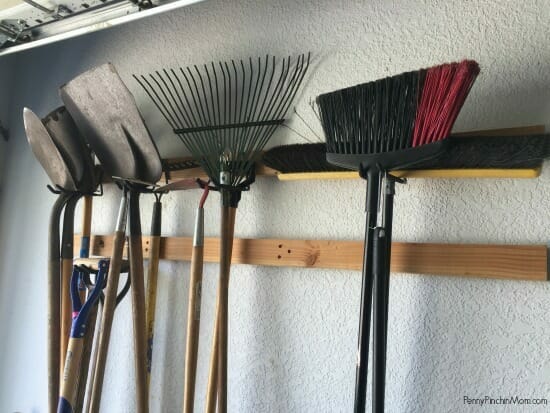
We also attached 2×4 to the wall of the garage (into the studs with large screws). We purchased brackets so that we could hang our tools such as shovels and brooms. That way, they were up off of the floor.
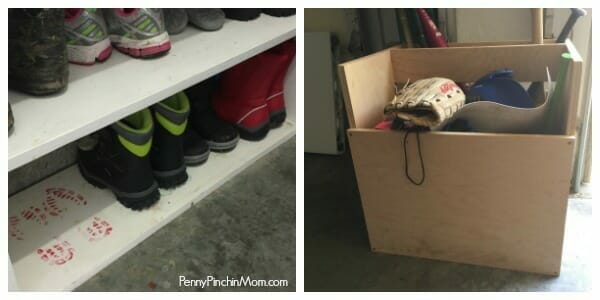
We purchased a shoe rack for his boots so they were up off of the floor. We also added a magazine rack to store our grocery sacks (so we can easily grab them as we head off to the store each week).
And finally, since I have a very handy hubby, he built a shoe rack as well as a sports gear storage box! These keep the kids boots and shoes off of the floor. It is also helpful for the kids when they are done playing ball, because they know exactly where to put their items away!!
There are so many different ways you can organize your garage space, so you might check out Pinterest or your local home improvement store for storage solutions.
Return everything back into the garage
I will be honest and say that this is the longest part of this project. The reason is that you will be going through many boxes and piles of “stuff” and it may take time to go through it all. Keep items together such as sporting goods, tools, seasonal items, camping gear, automotive, etc.
The more that items are kept in a central location, the more likely it is they will be more easily located when needed and then returned to their home when they are dong being used.
It is also good to consider where you would go to use items. For instance, if you keep the shoe rack across the garage it may not get used properly. However, if you move it near the entrance to the house, it is where it can be seen and used by your family members in the right way.
This is also the time to determine what to keep and what not. Here is a handy guide:
KEEP
– items used frequently
– seasonal items still used
– tools and sporting goods still used
– paint colors in your home (label cans by room name)
TOSS
– anything broken, damaged or leaking
– paints and chemicals that are no longer used (do not just toss, but dispose of properly)
– random pieces or parts to items no longer owned (or that you do not identify with)
DONATE
– old tools and things not used
– toys and camping items no longer used
– do not keep anything out of guilt
BONUS TIP: Do not go through your holiday items at this time. Instead put it all away on the shelf. One you decorate for this year, you will find the items that you no longer want or use. Do not return them to your garage shelf, but rather, donate or trash them as needed.
Arrange for donation pick-up or drop-off yourself
Many times, there are charities looking for good useable items for their store. You can contact one of them about scheduling a pick-up of the items you do not need. They will come and take them away and leave you a receipt for tax purposes (so make sure you keep a list).
You may also know of a location where you can take these items yourself. You may have to temporarily house them in the garage while you wait to get rid of them, but try to do it as quickly as you possibly can.
Sweep out the garage
And now, you are done!! Your garage is once again useable space. Just make sure you schedule regular organization (at least 2 – 3 times per year) and it should stay cleaned and organized.
The AFTER of our clean and organized garage space!!
