INSIDE: Make a DIY Moby wrap for pennies with our no-sew instructions. Babywearing is an easy way to give infants the snuggles and contact they need!
The Moby Wrap is a favorite babywearing item for moms. However, a wearable baby carrier is often quite expensive. Find out how you can make your very own no-sew baby wrap.
When my children were babies, I loved my Moby carrier wrap. However, it took me a while to find a baby wrap that worked. There are too many of them, and besides being expensive, some of them are very difficult to use.
I was tired of being confused, so I did some research and found a way to make my own baby wrap! Best of all, no sewing is needed!
Wearing a Moby Wrap is not hard. I’ve got easy-to-follow step-by-step instructions below so you can learn how to put it on and how to wear your baby properly.
Note that this DIY moby wrap works best for infants 12 months and younger. (A similar wrap from Boba is recommended for infants up to six to nine months, but the maker claims that it’s useful for cuddling bigger babies on days when they need extra love and comfort.)
This baby carrier tutorial is customizable as far as fabric goes. But I recommend that you use a fabric that’s stretchy (think t-shirt material) but not too stretchy. I loved this bright blue birdy fabric I found, and it was perfect for me.
I found my fabric at JoAnn (and, of course, I used a coupon). Make sure you look at the current craft store coupons before you shop so that you can make this already affordable babywearing item even less expensive.
While the standard length of a Moby Wrap is 6 yards, you don’t have to make yours that long, and that’s one of the great things about making your own DIY Moby wrap.
I found that using 5 1/2 yards instead was perfect. If you think 6 yards is not long enough, you can always make yours a bit longer. You need your baby wrap to fit you snuggly while keeping your baby safe.
Other posts you’ll love:
- DIY Baby Shower Diaper Wreath
- Baby Shower Laundry Gift Idea
- 10 Tips for Saving Money on Infant Formula
- 8 Easy Ways to Save Money on Diapers
- 11 Baby Items You Don’t Need to Buy
HOW TO MAKE A MOBY WRAP
SUPPLIES:
- About 5.5 yards of knit fabric
- A pair of scissors
- A baby (preferably your own)
INSTRUCTIONS:
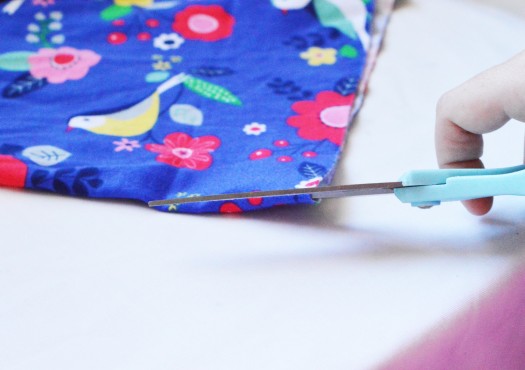
Most fabric is 45″ wide, which is just too wide for a wrap. Cut it down the middle lengthwise so it is 22 1/2″ wide. TIP: Follow the crease in the center to cut a straight line. Because you’re using a knit material, it will not fray. That’s why you don’t have to sew a thing!
One piece of fabric cut in half will give you two wraps. You can toss one into the wash and have a backup to wear instead.
WRAPPING DIRECTIONS FOR YOUR DIY MOBY WRAP
The rest of this tutorial will be used to demonstrate how to wear a DIY Moby Wrap and carry your baby safely.
First, find the middle of the wrap. You can sew a small piece of ribbon in the middle of the wrap to make finding the middle easier – but that is not necessary. You can also fold it in half and easily find the center.
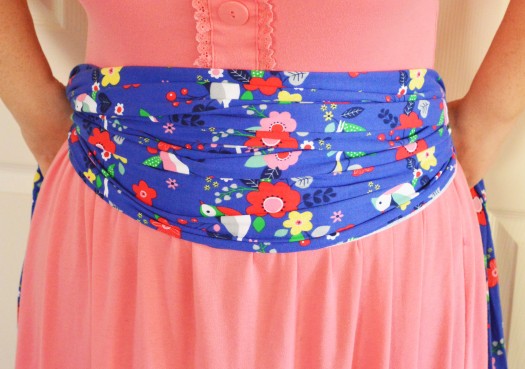
Once you have the center located, bunch it slightly and wrap it tightly (but not too tight) around your middle.
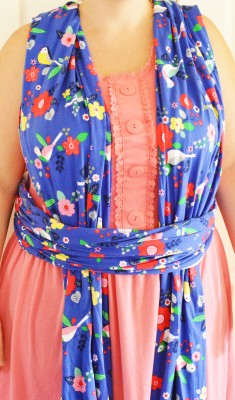
Next, using one hand, hold one side of the wrap behind you. Take the other side and cross it over your shoulder and through the waist, as in the photo above. The back straps will end up creating an “X” on your back (so keep that in mind when putting it on).
Grab the other piece, cross it across your back, and tuck it into the other side of the waist. Make sure it is all pulled snuggly, adjusting as needed.
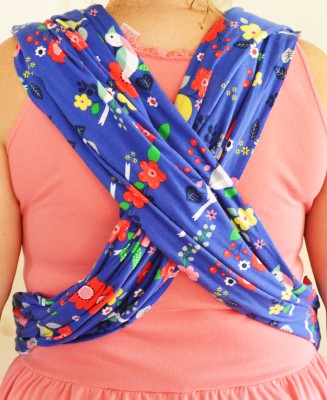
You need to make sure the wrap hanging toward your feet is even on both sides. Continue to adjust it until it is.
This is what it will look like from the back at this point. Leave a little slack for the baby to fit in, but not too much slack. Just an even tension.
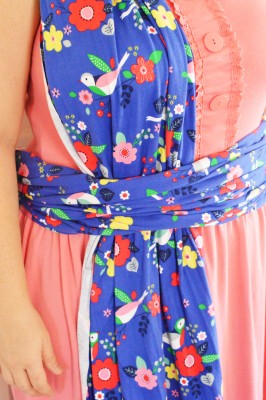
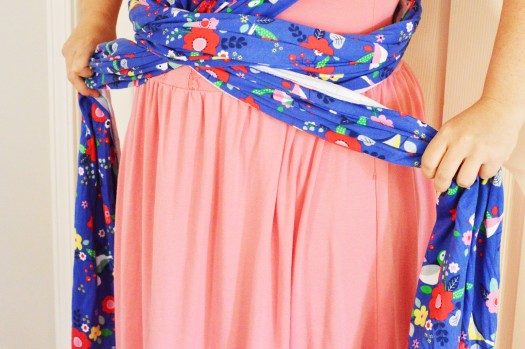
Next, you will take the two front pieces and cross them, as shown above.
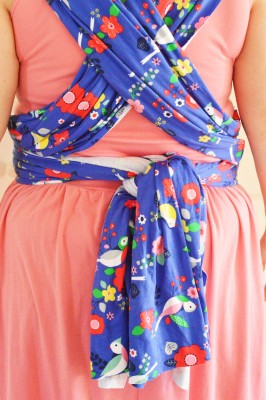
Take the straps and wrap them behind you. Tie any additional fabric into a knot. If there is a LOT of excess fabric, you can bring the sides back around to the front and tie it there. The image above shows how it will look from the back.
HOW TO WEAR YOUR BABY IN A WRAP
Once you’ve put on your baby carrier, it’s time to add a baby!
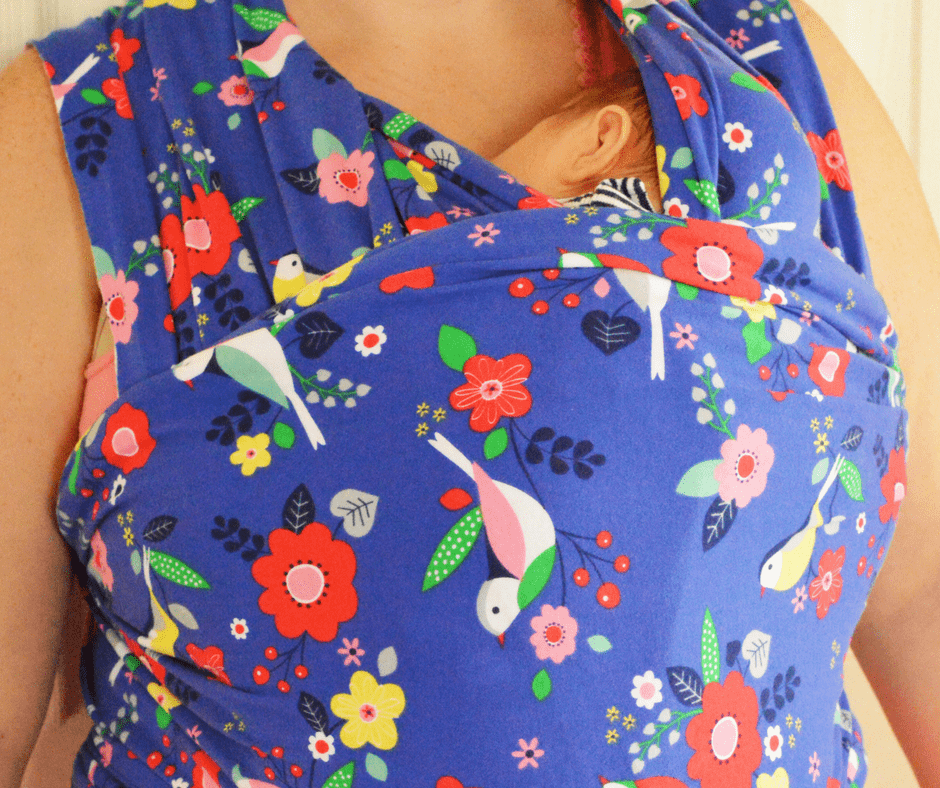
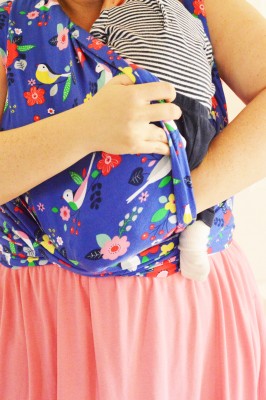
Place one leg into one side of the front pouch and one into the other side. The baby’s legs will slide through the pouch on both sides as the baby is lying against your body. The baby’s hips should make a “W” position (see image below).
Note for babies four months or younger: Keep their feet inside the pouch – do not try to slide them out.

This picture shows how you will snugly wrap the pouch around each side of the baby as you tuck its legs in. Do one side at a time.
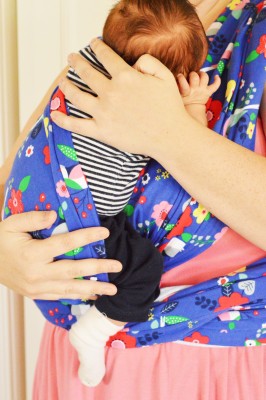
Then you will pull the front pouch up and over the baby’s whole back to give the baby additional support. Everything should feel snug and secure.
That’s it! Tuck the baby’s cute little head in (you’ll know if he or she is safely high enough on your chest if you can easily kiss the top of the baby’s head) if the baby isn’t strong enough to hold his or her head up.
This hold is only good for wearing the baby on your front, so please do not wear your baby on your back in this fashion. Also, the Moby wrap is usually good to hold a baby of up to around 15 pounds. Another type of wrap, the Mei Tai is better suited to larger babies.
