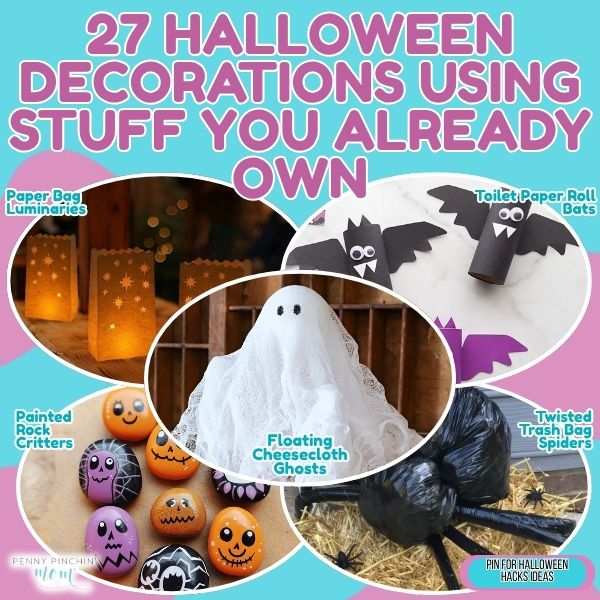
Target wants $40 for a light-up skeleton that’ll live in your garage by November. Spirit Halloween somehow makes paper bats cost $12. You know you could make this stuff yourself, but who has the energy after a day of everything else?
These 27 decorations cost almost nothing because you already own most of what you need. Toilet Paper Roll Bats transform your recycling bin into a whole colony for free. Paper Bag Luminaries line your walkway for under $3 total. Floating Cheesecloth Ghosts haunt your porch for about $5, and the kids can actually help without the project turning into chaos.
1. Paper Bag Luminaries
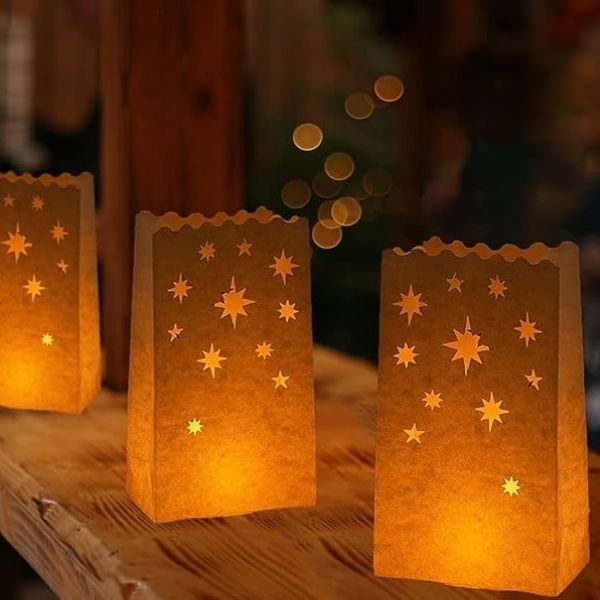
Brown paper lunch bags transform into eerie pathway lights for under $3 total. Cut out bat shapes, jack-o-lantern faces, or ghost silhouettes from the bag fronts, fold down the tops about two inches, fill the bottoms with a cup of sand or dirt from your yard, and drop in a battery-operated tea light. The whole batch of a dozen costs around $2 for the bags (or free if you saved them from school lunches) and maybe $1 for tea lights at Dollar Tree. Line them up along your walkway or front steps. They look surprisingly elegant when lit up at dusk, and neighborhood kids always slow down to check them out.
2. Toilet Paper Roll Bats
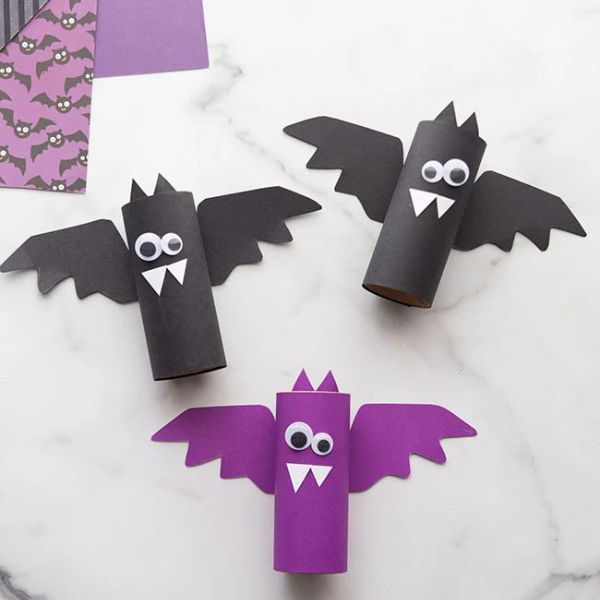
When you’ve got a stack of empty toilet paper rolls, you’re twenty minutes away from a bat colony. Paint them black (or leave them plain for rustic brown bats), let them dry, then flatten one end and cut pointed ear shapes. Cut wing shapes from black construction paper or an old garbage bag and glue them to the sides. Add googly eyes if you have them, or just draw eyes with a white paint pen. The whole project costs maybe $1.25 if you need to buy paint; otherwise it’s completely free. Hang them from your porch ceiling with fishing line at different heights for a swarm effect.
3. Floating Cheesecloth Ghosts
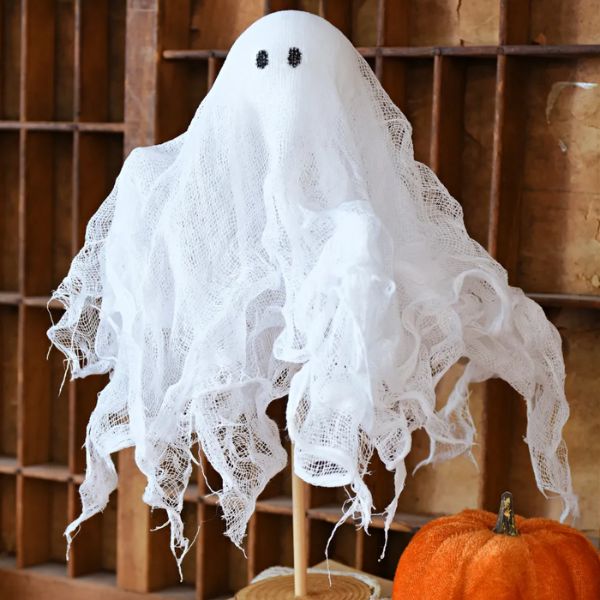
Old white sheets or a $3 roll of cheesecloth from the hardware store makes a front yard full of ghosts. Blow up balloons to different sizes for variety, drape fabric over them after diluting white glue with water and soaking the fabric, then let them dry completely draped over the balloons. Pop the balloons once dry, add black felt circles for eyes, and hang them from tree branches with fishing line. Position them at different heights so they look like they’re floating toward your front door. Six ghosts come in under $5 total if you use an old flat sheet instead of buying cheesecloth.
4. Painted Rock Critters
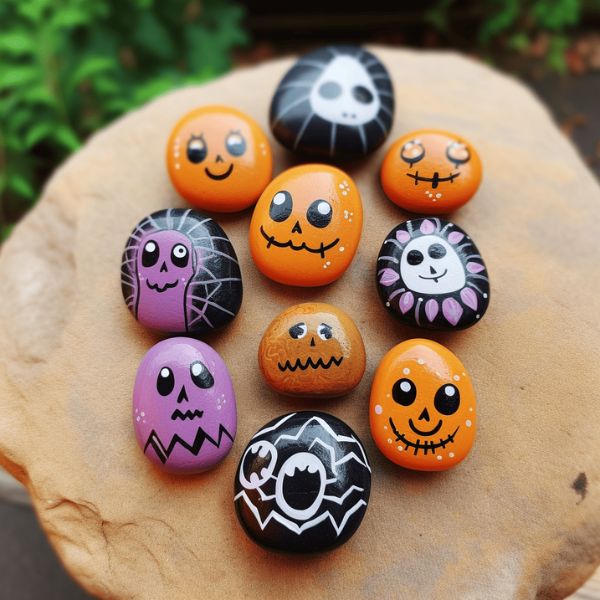
Those rocks your kids collected all summer finally have a purpose. Wash them, paint them orange for pumpkins or white for ghosts, let them dry, then add faces with a black Sharpie or acrylic paint. Bigger rocks become doorstops, smaller ones line your walkway or fill a bowl on the porch. The paint costs about $1-3 if you don’t already have some, but each rock is free. Stack three painted rocks on top of each other with a dab of hot glue for a rock pumpkin tower that won’t blow away in the wind.
5. Twisted Trash Bag Spiders
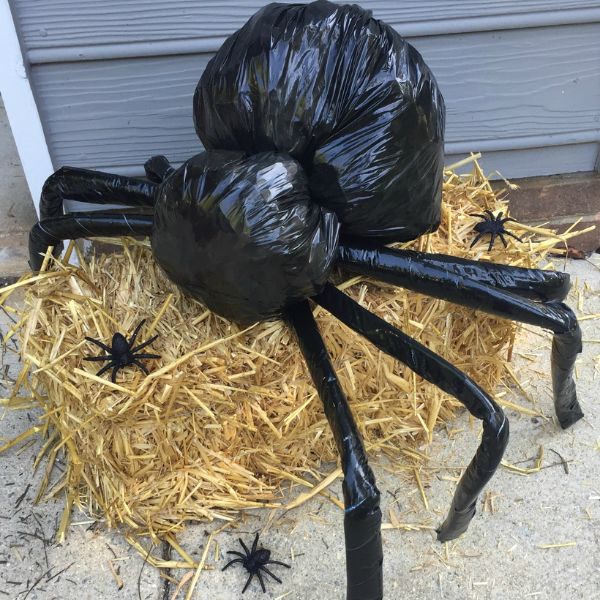
For about $0, you can turn black trash bags into giant spiders using stuff already in your house. Stuff one bag with newspaper or old plastic bags to make a body, twist it closed, then cut seven more bags into long strips for legs. Attach the legs by tying them around the twisted neck of the body bag. Add red or yellow construction paper eyes or use glow-in-the-dark paint for eyes that shine at night. Make them huge for the front porch or smaller for tabletop decorations, and bend the legs into creepy poses that look like they’re crawling.
6. Stick Witch Brooms
Fallen twigs and branches from your yard become miniature witch brooms in about fifteen minutes. Gather thin, flexible twigs about eight to twelve inches long, bundle ten or fifteen together at one end, and wrap tightly with twine, raffia, or even just brown string. Hot glue a thicker stick perpendicular to the bundle for a handle. Each broom costs nothing except maybe 50 cents for twine if you don’t have any. Lean them against your porch railing, prop them by your door, or tie a bundle together with ribbon for a rustic centerpiece. The imperfect, scraggly ones look more authentic than anything you’d buy.
7. Milk Jug Ghosts
Those gallon milk jugs pile up fast, and three of them make a ghost family for your front steps. Rinse them out, draw ghost faces with black permanent marker, and stick a battery-operated tea light inside each one. Set them out after dark, and the white plastic glows perfectly spooky. The jugs are free, the tea lights come to about $1 at Dollar Tree, and the marker you probably already own. Weight them down with a handful of rocks inside so they don’t blow over on windy nights. Make different-sized ghosts using gallon, half-gallon, and quart containers for a whole ghostly village.
8. Cardboard Tombstones
Moving boxes or appliance boxes from your garage, cut into tombstone shapes and painted gray look shockingly realistic stuck in your front yard. Cut them about two feet tall, round or angle the tops, paint them with whatever gray paint you have (even spray paint from other projects works), and add cracks or names with black paint or marker. Each tombstone costs nothing if you use leftover paint and saved boxes. For extra realism, add moss-like details with green paint dabbed on with a sponge for tombstones that look centuries old. Attach wooden stakes to the back with hot glue so they stand up in your lawn.
9. Coffee Filter Ghosts
White coffee filters make the perfect ghost material because they’re thin, cheap, and already the right shape. Bunch a filter around a cotton ball or wadded tissue for the head, tie it with white string or a twist tie, then draw a simple face with black marker. Make dozens for under $2 since a pack of filters totals maybe that much, and you probably have everything else. Hang them from the ceiling, tape them to windows, or string them on fishing line for a ghost garland. The filters have a delicate, floaty quality that moves with air currents, which makes them look like they’re hovering.
10. Painted Leaf Garland
The leaves already falling in your yard cost nothing and make beautiful Halloween garlands when painted. Collect leaves in different sizes, let them dry flat for a day between newspaper pages, then paint them orange, black, or leave some their natural brown. Once dry, hot glue them to twine or string spaced about three inches apart. The whole project is free except for maybe $1-2 in paint if you need to buy it. String them across the mantel or along the porch railing. The natural texture mixed with paint gives it a handmade look that feels more expensive than plastic garland.
11. Tin Can Lanterns
Turn empty soup cans into punched-tin Halloween lanterns with just a hammer and nail. Fill the clean can with water and freeze it solid (the ice prevents denting), then use a nail and hammer to punch holes in a pattern. A jack-o-lantern face, a ghost outline, or just random holes for starlight effect all work well. Thaw out the ice, paint the outside black or orange if you want, and drop in a tea light. Each lantern is free except the tea light, which totals maybe $1 for a pack. These look amazing lining steps or grouped on a table.
12. Newspaper Spider Webs
Twist old newspapers into ropes and arrange them in web patterns for giant decorations that cost next to nothing. Roll sheets of newspaper diagonally into tight tubes, tape the ends, then arrange them in a web pattern on your wall or porch. Three or four tubes radiating from a center point with connecting pieces between them create the classic web shape. Tape or tack them in place, then add a plastic spider from last year’s decorations or make one from black paper. The whole thing is free if you get a newspaper or pick up the free community paper. Spray paint them white or leave them newsprint for a vintage look.
13. Egg Carton Bats
Cardboard egg cartons cut into bat shapes use up something you’d throw away anyway. Cut out individual egg cups, trim them into bat wing shapes by cutting V-notches on the sides, paint them black, and add googly eyes or draw eyes with white paint. Each bat costs nothing except maybe a dollar for black paint. Hang them at different heights from fishing line on the porch ceiling, and they look like a swarm. The dimensional quality of the egg cup makes them more interesting than flat paper bats.
14. Mason Jar Mummy Lights
Those mason jars collecting dust in your cabinet become mummy lanterns with torn fabric strips and googly eyes. Tear old white fabric or gauze into one-inch strips and wrap them around the jar in a messy, overlapping pattern, leaving a gap for the face. Hot glue two googly eyes in the gap. Drop in a battery-powered tea light, and you’ve got a mummy that glows. Each jar is free if you already own them, fabric strips cost nothing from old sheets or clothes, and eyes cost around $1.25 at Dollar Tree for a pack that’ll do multiple jars. Group three or five together on your porch table for more impact than one alone.
15. Handprint Ghosts
White construction paper and your kids’ handprints make adorable ghost chains that look homemade in the best way. Trace their hands on white paper, cut them out, draw simple ghost faces on the palms, and string them together with tape or string. A pack of white paper costs about $1.25 and makes dozens of ghosts. My grandkids asked to make these every year because they could see their handprints turned into decorations. Hang the chain across a doorway or window, or tape individual ghosts to walls in a floating pattern.
16. Twig Wreath Base with Leaves
Flexible branches from your yard woven into a wreath form cost absolutely nothing and look better than store-bought. Gather long, bendy branches like willow or grapevine, weave them into a circle about twelve inches across, and secure with thin wire or twine where they overlap. Hot glue painted leaves, small gourds if you have them, or even just leave it plain and rustic. The only possible cost is hot glue, which you probably already have. Add a black ribbon bow or a small stuffed crow for extra Halloween effect. These last for years if you store them carefully.
17. Painted Pinecone Pumpkins
Pinecones painted orange with green stems become the cutest mini pumpkins for bowls and tablescapes. Collect pinecones from your yard or a park, paint them orange (about $1-2 for craft paint), let them dry completely, then glue a small piece of green pipe cleaner or a twig to the top for a stem. Each pumpkin costs pennies and looks professionally crafted. Fill a wooden bowl or basket with a dozen of them for a centerpiece that guests always comment on. The natural texture of the pinecone gives them dimension that flat decorations don’t have.
18. Window Silhouettes
Black construction paper cut into spooky shapes and taped to windows from inside creates dramatic nighttime displays that look complicated but aren’t. Cut out witch silhouettes, haunted house skylines, cat shapes, or bare tree branches and tape them to your windows so they show as black shapes when your interior lights are on after dark. A pack of black construction paper costs around $1.25 and makes enough silhouettes for every window. Sketch the shapes freehand or trace from images on your phone screen. From outside at night, your whole house looks like a shadow puppet show, and it takes maybe an hour to do all your front windows.
19. Fabric Scrap Bunting
Leftover fabric from old projects or worn-out clothes cut into triangles and strung on twine makes festive Halloween bunting for free. Cut triangles about six inches wide at the top and eight inches tall from orange, black, or patterned fabric. Fold the top edge over your twine and hot glue it down, spacing triangles about three inches apart. The whole project uses scraps you already have and maybe 50 cents’ worth of twine. When my kids were little, we made ours from an old orange tablecloth that had a stain and a black t-shirt with a hole. Hang it across your porch, along the mantel, or between two trees in your yard.
20. Toilet Paper Tube Monsters
Save toilet paper tubes for a month, and you’ll have enough to make a whole monster family for your porch steps. Paint them in monster colors like green, purple, or orange, add googly eyes, draw mouths with markers, and glue on construction paper arms, horns, or hair. Each monster costs basically nothing since the tubes are free and you probably have paint and paper. My grandkids made these last year and came up with the wildest monster designs. One had six eyes and pipe cleaner antennae. Stand them on your porch railing or group them on a table like they’re having a monster party.
21. Stick and Yarn Spider Webs
Two sticks crossed and wrapped with white yarn create dimensional spider webs that cost about 50 cents each. Cross two sticks of equal length to make an X, secure the center with hot glue, then wrap white or gray yarn from the center outward in a spiral pattern, weaving over and under the sticks as you go. The sticks are free from your yard; yarn you’ll spend about $2 for enough to make several webs. Hang them from tree branches or the porch ceiling, and add plastic spiders if you have them. The handmade imperfection makes them look more realistic than perfect store-bought webs.
22. Pillowcase Ghosts on Stakes
Old white pillowcases or sheets stuffed with plastic bags and mounted on garden stakes become yard ghosts for under $2. Stuff the pillowcase with wadded plastic grocery bags to create a head shape, tie it closed with string about six inches down to create a neck, drape the rest of the fabric naturally, and draw a face with black permanent marker. Push a tall garden stake or sturdy stick up through the bottom into the head stuffing. Each ghost costs nothing if you use old linens and bags you’ve saved. Scatter five of these around your front yard at different heights, and they blow and flutter in the wind like they’re floating.
23. Glowing Eyes in the Bushes
Empty toilet paper rolls with glow sticks inside create the creepy illusion of eyes watching from your bushes. Cut eye shapes into the rolls, like slits for cat eyes, circles for owl eyes, or narrow almond shapes for something more sinister. Crack a glow stick and drop it inside, then tuck the roll into your bushes or hedges. At night, the glow sticks shine through the eye holes and look like creatures lurking in the dark. Glow sticks cost about $1 for a pack at Dollar Tree. This is the decoration that makes trick-or-treaters do a double-take and point.
24. Brown Paper Bats
Brown paper grocery bags cut into bat shapes and taped to walls create a swarm effect for free. Cut bat silhouettes in different sizes, some with wings spread wide and others with wings folded. Tape them to your walls, door, or porch like they’re flying. Each bag makes three or four bats depending on size. The bags cost nothing if you save them from groceries, or ask the store for a few extras. Cut out twenty bats in different sizes and cover half your front door with them in a spiral pattern that looks like they’re flying in a tornado. The brown color looks more natural than black construction paper.
25. Yarn Wrapped Mummy Jars
Baby food jars or small mason jars wrapped in white yarn become mummy containers for candy or tea lights. Wrap the jar completely in white yarn or string, securing the ends with hot glue, then glue on two googly eyes. Drop in candy corn or a tea light. Each jar is free if you save them, and yarn runs about $2 for enough to wrap a dozen jars. Make a whole row of these as treat jars for a Halloween party, and kids can pick their favorite mummy to take home. The yarn texture gives them a gauzy, wrapped look that reads as mummy bandages.
26. Cardboard Box Haunted House
Your Amazon box sitting in recycling becomes a tabletop haunted house with some cutting and paint. Cut out windows and a door, paint the outside black or gray, add details like shutters and roof shingles with marker or paint, and put a battery-powered tea light inside so the windows glow. The box is free; paint costs maybe $1-2 if you need to buy it. My grandkids drew all the spooky details on ours. Crooked shutters, boarded windows, ghosts peeking out. Put it on your porch table or mantel with the light glowing inside for instant atmosphere.
27. Leaf Skeleton Door Decoration
Large leaves traced onto black paper and cut out to show just the vein structure create elegant skeleton leaf door decorations. Collect big leaves like maple or oak, trace them onto black construction paper, then carefully cut away everything except the stem and main veins to create a skeleton effect. Tape or tack them to your front door in an overlapping pattern. A pack of black paper costs about $1.25, and the leaves are free. This one takes a little more patience with the cutting, but the effect is worth it. They look delicate and spooky at the same time. Back them with white paper if you want the skeleton veins to show up more dramatically.
Your Spooky House Without the Scary Bill
Credit card hangover from buying overpriced decorations? It doesn’t have to happen this year. The struggle to make your house look festive without blowing your budget is completely real, but you just found 27 ways around it using stuff you already have.
Start with Paper Bag Luminaries if you need your walkway looking amazing tonight, grab some toilet paper rolls for the Toilet Paper Roll Bats if your kids want to help, or turn your recycling into Milk Jug Ghosts when you want something that looks store-bought. You’re not settling by making these yourself. You’re decorating exactly the way you want without the guilt when the statement arrives. Your house is about to be the Halloween house on the block, and you’ll still have money left for the good candy.