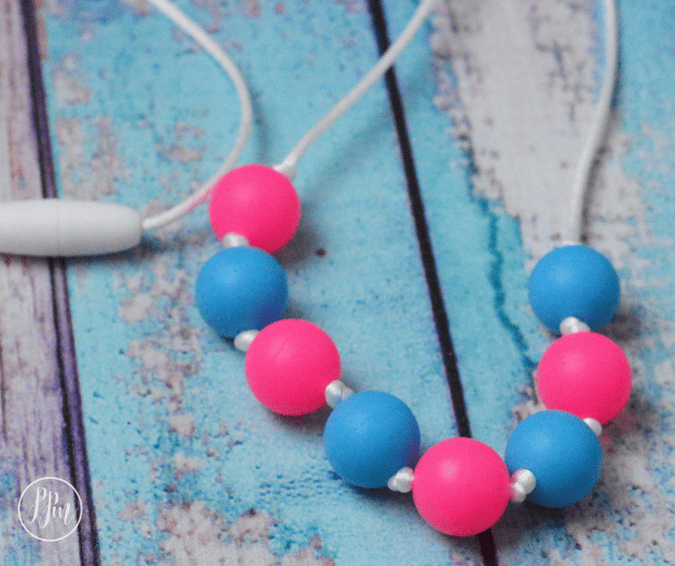
If you have a little one, you know that they get to a certain age and everything they touch goes into their mouths. And, it is usually things we would like for them not to! I have seen silicone teething necklaces for mom at big box stores, but they were a bit more than I wanted to pay. Not only that, I did not really care for them. That’s when I decided to make my own.
The most important thing to keep in mind when making a teething necklace is safety. That means you can’t just use any products you find. You need to use food-grade silicone products. These are safe to use for cooking and therefore, safe to put in your mouth (or your baby’s mouth).
It took me some time, but I was able to find the silicone beads that are OK for babies to chew on. While you can find them from stores overseas, I did not trust them. I opted to buy them from a USA store instead, which gave me peace of mind. And, since the package contained more than I needed for my necklace, I was able to make a few for my mom friends (and they loved them)!
You can make different necklaces in varying colors and styles, so it will coordinate with your wardrobe. It may look like you are wearing an ordinary necklace, but you are wearing something made just for your baby!!!
HOW TO MAKE A TEETHING NECKLACE FOR MOM
SUPPLIES
36″ Nylon Cord
1 Plastic clasp
7-10 food grade silicone beads
You will want to find food grade silicone beads to use. As mentioned above, there are many sites that sell them, but I opted to buy them from Etsy. There are many resources that sell these at prices that are affordable. And, you get plenty so you can make teething necklaces for your friends too!
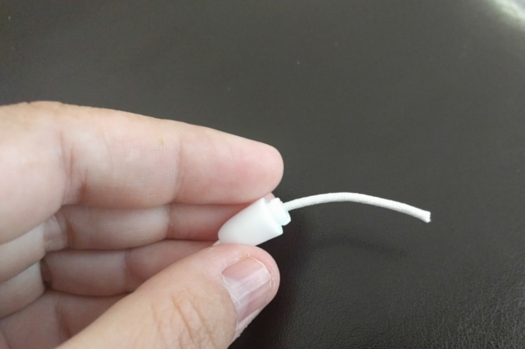
To begin, run the end of your cord through one of the halves of the plastic clasp. Tie a knot in the end of the cord, and it will keep the clasp in place. Decide where you want your beads to start on your necklace. I placed mine on my chest, to give me an idea of where I wanted the beads to be.
Tie a knot in the cord where you want the beads to start. String on a bead up to the knot. If you want your beads to stay put, put a knot between each bead. String on as many beads as you want, and when you’re finished, tie on the second half of the clasp, like you did the first half of the clasp.
I love the idea of doing this as a craft project at Mother’s Day Out or your Mother play date group! Make extras and give them to new moms. You could even make and sell them at your local craft fair!


