Fun Ikea jar hack idea!! Upgrade affordable Ikea Korken jars for just pennies!
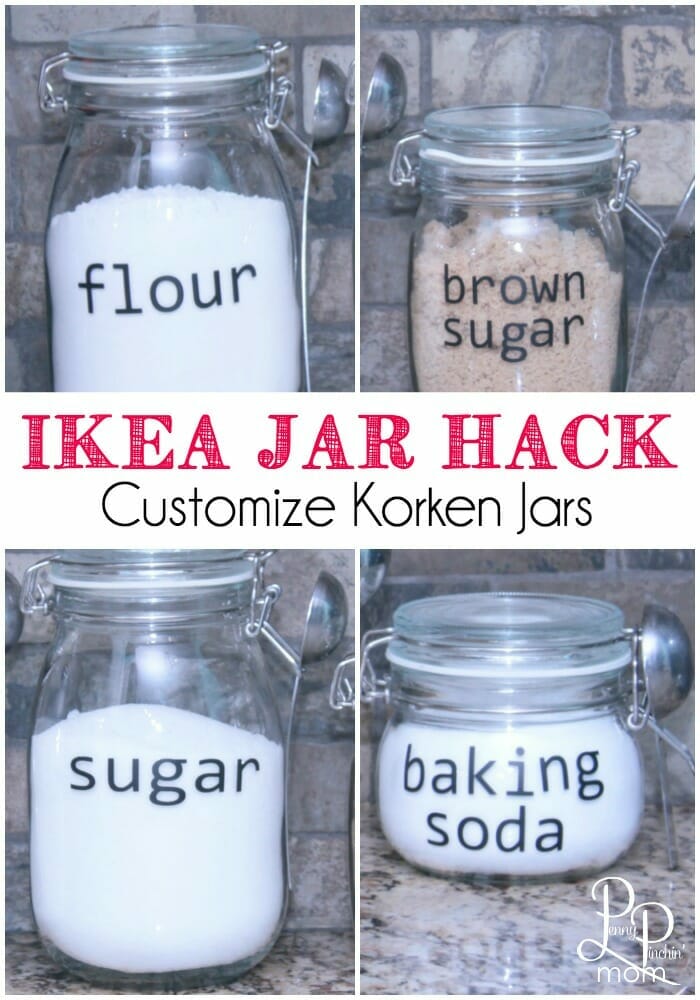
These adorable glass canisters are super affordable and very easy to make! Your family, friends and counter tops will all be impressed!
Other fun DIY projects:
SIMPLE IKEA JAR HACKS
SUPPLIES
IKEA Korken jars in various sizes (this is another alternative idea from Amazon)
Silhouette or Cricut cutting machine**
Black vinyl
DIRECTIONS FOR VINYL LETTERS
Using a vinyl cutting machine (Silhouette or Cricut) cut out the words for the specific items you plan on putting in these jars (Flour, sugar, rice, etc). You can use any font, but to recreate this same look, use CONSOLAS in size 100.
MAKE LABELS OUT OF PAPER AND TAPE
Alternatively, if you don’t have a Cricut or Silhouette machine, you can make them with regular paper and tape! Check out this additional way to make labels for your jars!
SUPPLIES
Printer
Strapping Tape
Bowl with water
DIRECTIONS
Type your label phrase in Word or Google and print it. Make sure it is the right size for your jar. That means you may need to try a few different sizes until you find the right one.
Once you have the right size, place a piece of tape over the top of the phrase. Cut it out and then submerge it in the bowl of water. The paper will curl and that is OK.
Let it sit for about 3 – 4 minutes. Then, pull it out and slowly start rubbing the back of the tape with your finger. The paper will start to peel away, leaving the ink stuck to the tape. Tape your new label to your container!
***If you don’t have a cutting machine, you can do this same project with a stencil and paint; or pre-cut letter stickers.