I’m always looking for creative storage options for my daughter’s room. She has so much stuff, and so many books, sometimes things can get lost in the shuffle!
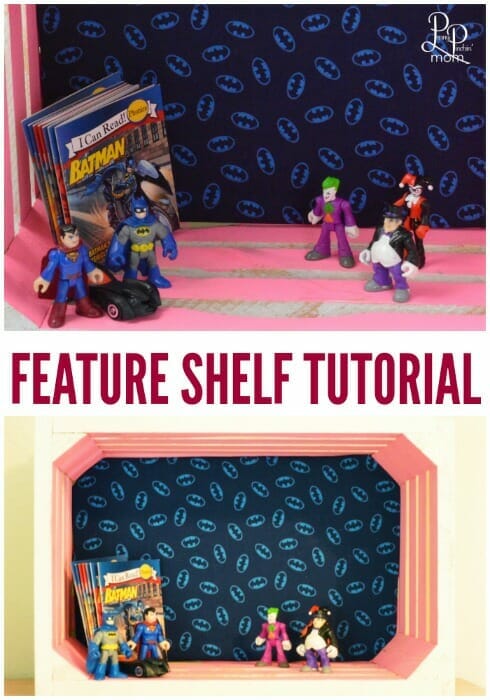
My daughter is a girly-girl, but she still has a love for Super Heroes. That can present a challenge when I want to find decorations for her room. That usually means I end up making something for you.
This simple feature shelf is extremely simple to make and there are endless possibilities when it comes to design. We chose a girly batman theme, because that was what worked for us, but you could theme it after any rom in the house! This could easily provide cute storage for your bathroom, your kitchen, your laundry room, a craft room, and the list goes on.
What will you make?
SUPPLIES:
Craft Glue
Pins
1/4 yard of fabric
Wooden Crate
Cardboard
Acrylic Paint
Foam Brush
First, dry fit your cardboard into the back of your wooden crate to make sure it will fit. You may need to trim the corners in order to get it to fit in properly.
Next, paint the wooden crate whatever colors you want. You can do accent colors by painting the outside one tone and the inside another. There are no rules here! We chose to paint only the inside of the crate and left the outside the natural color.
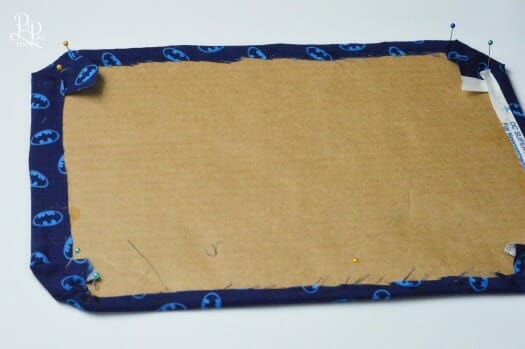
While the paint is drying, you will want to wrap your cardboard with the fabric. Make sure you leave around 1″ or so of fabric overhang.
Beging gluing (one side at a time) by running a bead of glue along the edge of the cardboard. Press the fabric down into the glue to hold it in place. Make sure you continue to tug on the fabric as you glue it on, so you do not have wrinkles on the front. Use pins to hold it in place while it dries (around 1 – 2 hours).
Once dried, place a generous amount of glue on the inside of the box’s wooden slats, paying careful attention to the corners and edges. Press the cardboard into place (making sure the fabric is facing outward. Allow it to dry completely overnight, and then you’re ready to use it!
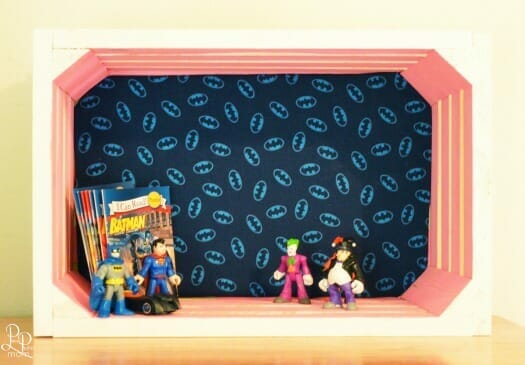
We are using our storage box as a way to keep track of all our super hero books, and some of her Imaginext characters. It adds such a unique pop of color to her room, while also providing an awesome storage option to fit our needs. This was also a very affordable storage option as well.