By February, your car cleaning routine has usually fallen apart. Boots track in slush and snack wrappers disappear into the seat tracks, and the cup holders have that sticky ring that makes you wince every time you reach for your coffee. I once let my grandkids eat crackers on a long drive and found crumbs wedged in the console gap for weeks.
These car cleaning hacks work through those trouble spots, starting with whatever bugs you most. Sticky cup holders come clean with a soapy cloth and an old sock. Crumbs packed into the seat tracks come out with a butter knife wrapped in microfiber. DIY car cleaning mostly comes down to what’s already under your sink, so there’s no detailing bill in any of this.
Start Small, Then Chase the Crumbs
1. Sticky Cup Holders
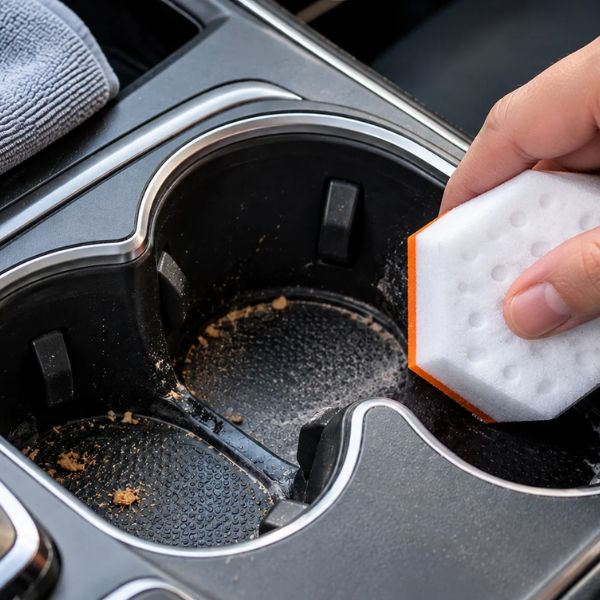
The ring at the bottom of a cup holder is dried soda most of the time, and the rest of the time nobody will own up to it. Push a clean old sock over your hand, dunk your fingertips in warm water with a drop of dish soap (store brand, $3 at Walmart), and twist your fist inside the holder. The sock reaches the bottom edge and the vertical sides in one motion. If the ring has gone hard, lay a warm, damp cloth over it for two or three minutes first, then twist.
Five minutes covers every holder in the car. Skip abrasive pads on soft-touch plastic, since they dull the finish permanently.
For prevention, drop in silicone cupcake liners sized to fit. A pack runs $6 to $9 at Target. Pull them out, rinse, done. That replaces the specialty cup holder cleaning tools that run $10 and up.
2. The Console That Sticks to Your Elbow
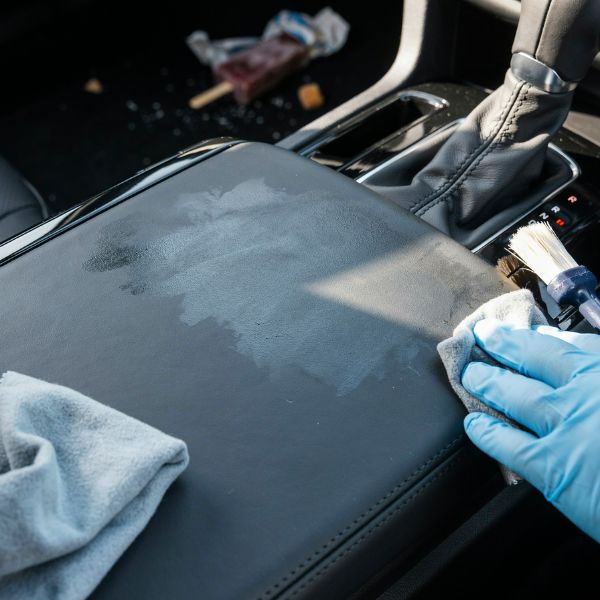
If the console lid feels tacky and you cannot remember why, it is almost always a sugar film. Mix warm water with a drop of dish soap, wring a microfiber cloth until it is barely damp, and wipe in sections. Follow immediately with a dry cloth so no moisture sits in the seams. For the grooves around the shifter and the seams at the lid hinge, a foam detailing brush (a multi-pack is $3 to $5 on Amazon) reaches what a cloth cannot.
The whole lid takes ten minutes. Keep vinegar and alcohol-heavy sprays off soft-touch matte plastic and any glossy screen trim, because they can strip the coating.
When my grandkids used to climb in after a popsicle at the park, that console took the hit every single time. A soapy cloth handled it for pennies, no console wipe packs needed.
3. Air Vents Full of Winter Dust
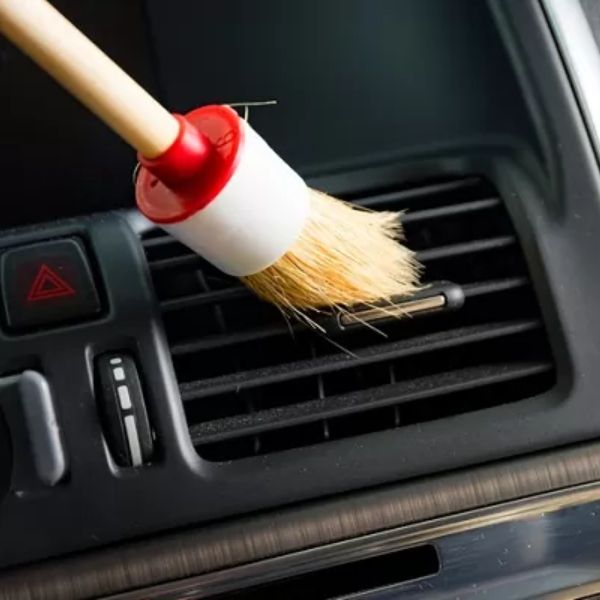
A foam paintbrush pulls dust straight out of vent slats without shoving it deeper. Craft store multi-packs run $3, or use a clean, unused makeup brush, $2 to $4 at Walmart. Run the brush along each slat, then across, and hold the vacuum hose right next to the vent so the loosened dust goes into the vacuum instead of back onto the dash. Figure 5 to 10 minutes per vent cluster.
Never spray cleaner directly into a vent. That moisture travels into the HVAC system and gives you a musty smell that is far harder to fix than dust. This method replaces the $10 to $15 detailing brush kits and canned air at $6 to $8 a can.
4. Crumbs Packed Into the Seat Tracks
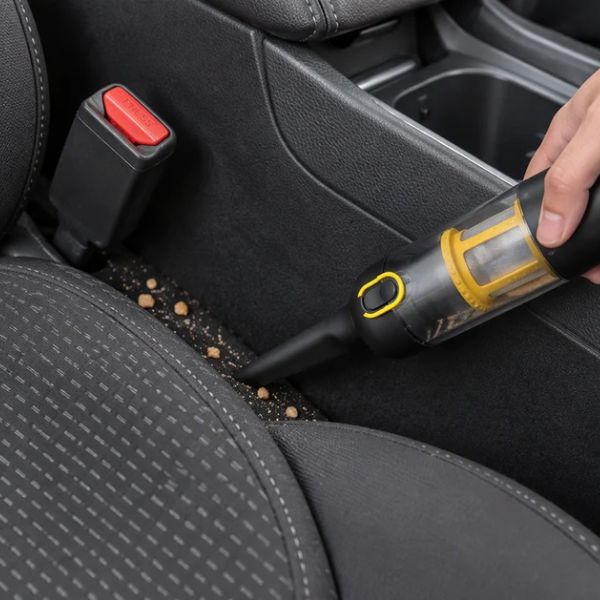
Slide the front seat all the way forward, then all the way back. Half the track is hidden at any given position, and that is exactly where a winter of granola bars ends up. Vacuum each exposed section with a crevice tool, then loosen whatever is wedged in with a stiff brush ($4 to $6) or a butter knife wrapped in a microfiber cloth, which costs nothing if you already own both.
If your vacuum did not come with a crevice attachment, a standalone one runs $8 to $12 at Walmart or on Amazon.
Each front seat takes 10 to 15 minutes. Keep liquid out of the tracks entirely, since the wiring and seat motors live right there. This is the step that replaces a quarter-fed vacuum bay run.
5. The Gap Between the Seat and the Console
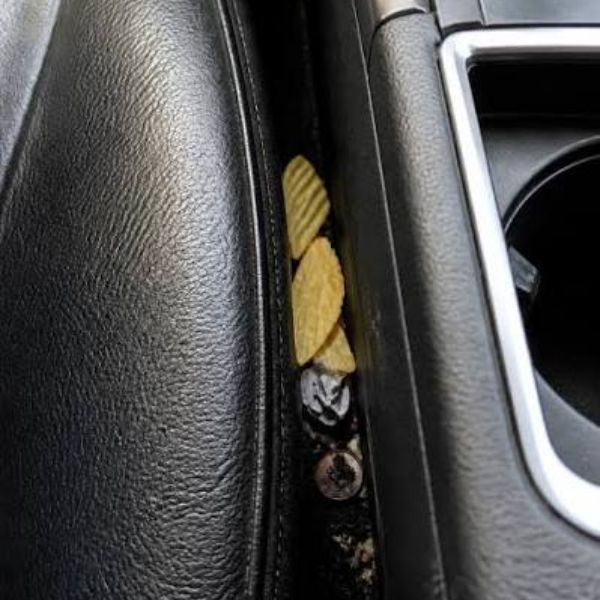
Crumbs, straw wrappers, fruit snacks, and the occasional quarter all live in that half-inch canyon. Run the crevice tool down the length of it first, then work the microfiber-wrapped butter knife along the bottom to drag the packed stuff up where the vacuum can reach it. Go slow near the back of the gap.
Five minutes a side.
A silicone gap tool, about $8 to $10 on Amazon, is a nice upgrade if you want something flexible that will not scratch leather, but the butter knife trick costs nothing. Do not jam a rigid tool deep under the seat. Airbag connectors and wiring sit under there, and a yanked plug turns a free cleanup into a repair bill.
6. Under the Child’s Car Seat
Pull the car seat out twice a winter, and you will find an archaeology site: cereal and dried slush, plus a sock nobody has missed since November. Vacuum the seat cushion underneath, wipe it with a barely damp soapy cloth, and let it dry fully before anything goes back in. Nothing new to buy beyond the $3 bottle of dish soap already under your sink.
Then reinstall exactly as that car seat’s manual directs, and check the belt path and the recline angle before you call it done. Reinstalling correctly matters more than cleaning quickly.
Budget 10 minutes, most of it on the reinstall check. Do not add aftermarket mats or seat protectors underneath unless the car seat manufacturer approves them. If the install feels off, a certified Child Passenger Safety Technician will check it for free.
7. Door Pockets and Door Panel Cubbies
Door pockets are where snack wrappers and a shocking volume of crumbs quietly pile up all winter. Empty each one completely, then vacuum with the crevice tool, pushing it into the back corner where the pocket meets the panel. Scrub the textured bottom with an old toothbrush you were already going to toss, then wipe with a cloth dampened in warm, soapy water and dry it. Ten minutes for all four doors.
Keep moisture off the speaker grille on the door panel, and wring that cloth out well before it goes anywhere near a window switch. Those pockets are also the first place to check when the car smells like old snacks. A $3 bottle of dish soap does what a $5 pack of interior wipes does, several dozen times over.
Car Seats, Done Safely
8. Getting the Cover Back On and the Harness Rethreaded Correctly
This step costs nothing, but your attention, and it matters more than anything else in this article. Work backward through your photos, thread the harness through the same slots at the same height, and run your hand down the full length of each strap to find twists. Give it 20 to 30 minutes.
A car seat is safety equipment, not upholstery. Cleaning it and putting it back together have to follow that specific seat’s manual, with no substitutions. A harness threaded through the wrong slot or a base that shifts more than an inch, is a real safety problem, not a cosmetic one.
If you’re not certain it went back correctly, a certified Child Passenger Safety Technician (CPST) will check it, usually at no charge through a local fire department or health department. Skip aftermarket liners and seat protectors too, the $15 to $25 kind, unless that manufacturer approves them.
9. Harness Straps and Webbing
Straps take the worst of it: wet mittens, and juice-sticky fingers reaching for the buckle.
Mild soap and water on a cloth is the method, and that’s it. Dampen a microfiber cloth (six for $8 to $12 at Target), add a drop of dish soap, and wipe the webbing down a section at a time. Follow with a second cloth dampened with plain water. Leave the straps pulled fully extended to air-dry before you let them retract.
Never use bleach, vinegar, solvents, or upholstery cleaner spray on harness webbing. Those $6 to $10 fabric cleaners are fine on seat cushions and wrong here, because harsh chemicals can degrade the fibers that hold a child in a crash. Don’t submerge or machine-wash straps unless the manual specifically allows it.
Fifteen minutes to clean, several hours to dry.
10. The Buckle That Sticks or Won’t Click
When the crotch buckle starts sticking, it’s usually crumbs and dried juice inside the mechanism, not a broken part. I was certain one of ours had failed one January. It was a blob of dried apple juice.
Most manuals say the same thing: swish the buckle in a cup of warm water for 15 to 30 seconds, shake the water out, and repeat until it clicks cleanly. No soap goes inside the buckle, and no lubricant, ever. Silicone spray and WD-40 attract grit and can keep the latch from engaging the way it should.
Check your specific manual first, because a few seats have their own instructions. Let the buckle air-dry fully before the next ride, and listen for a crisp click when you test it.
Five minutes plus drying, against the $20 or more a replacement buckle assembly runs from the manufacturer.
11. Salt Crust on the Base and LATCH Hardware
Road salt rides in on boots and lands exactly where a kid’s feet dangle, which means the base and the LATCH connectors collect a gray film all winter.
Wipe the hard surfaces with a cloth dampened in warm water with a drop of dish soap, then go back over them with a plain water cloth so nothing sticky is left behind. An old toothbrush gets salt out of the belt path and off the connector hooks. Dry everything with a microfiber cloth.
Leave lubricants and harsh chemicals off the hardware completely, and don’t soak the base. If a LATCH connector still binds after cleaning, call the manufacturer rather than forcing it.
Ten minutes, and the only thing it costs is that $3 soap.
12. Canopies, Carrier Handles, and the Seat’s Own Cup Holder
Infant carrier canopies and the little snap-in cup holders that come with convertible seats are their own small disaster zones by February.
Check the manual first, since many canopies unsnap and hand-wash while others have hardware sewn in and only spot-clean. For the cup holder, pull it off and soak it in warm, soapy water for 10 minutes, then run a toothbrush around the ribs. The carrier handle gets a soapy cloth and a dry cloth, with attention to the grip where hands go.
Air-dry everything fully before reassembly. That’s roughly 10 minutes of work, and the $3 bottle of dish soap covers all of it.
Last time my grandkids visited, I found a fruit snack welded to a canopy fold. Warm water took it right off.
Floors That Took the Worst of Winter
13. White Salt Stains on the Carpet Mats
Those chalky white rings are dried salt, and they lift with something already in your cabinet. Mix equal parts warm water and white vinegar ($3 to $4 a gallon at Walmart) in a spray bottle, then test it on a hidden corner of the mat first to make sure the color holds.
Lightly spray the stain, let it sit 5 to 10 minutes, then blot with a microfiber cloth (six for $8 to $12). Follow with a plain-water blot to rinse the vinegar out, press dry, and then leave the mat alone for several hours, because a damp mat under your heels turns into a musty floorboard fast.
Skipping the carpet stain remover spray saves $6 to $10.
14. Rubber and All-Weather Mats
Rubber mats are the easiest win in the whole car, and winter is exactly what they were built for. Pull all four out, hose them down, then scrub with a squirt of dish soap ($3 for Dawn or a store brand) and a stiff scrub brush, around $4 to $6 at Walmart or a hardware store.
Pay attention to the deep channels, since that’s where salt and grit settle. Rinse until the water runs clear and stand them against a fence or garage wall to dry, about 15 minutes of actual work plus an hour or two of drying.
Skip the glossy tire-shine style dressings here. A slick driver’s mat under a wet boot is a genuine hazard, not a detailing upgrade.
15. Pedals and Door Sills
Back when we were hauling kids to basketball practice winter after winter, the door sills built up a salt crust you could scrape with a fingernail. It wipes off with the same vinegar-water mix from item 13, so the only cost is the $3 jug of vinegar you already opened.
Dampen the rag, wipe the sills and the plastic step trim, then work an old toothbrush into the textured grooves where salt packs in. For the pedals, scrub the rubber pads with soapy water and dry them completely.
Five to 10 minutes covers all four doors and the footwell. Never put a shine product or protectant on pedal rubber; you want grip, not gloss.
16. The Carpet Hiding Under the Mats
Lift the mats out before you congratulate yourself, because the floorboard underneath usually took the worst of it. Vacuum the full footwell first, then run a crevice tool ($8 to $12 on Amazon if your vacuum didn’t come with one) along the seams where the carpet meets the console and the door jamb.
Spot-treat any salt rings with the vinegar-water mix, blotting rather than scrubbing so you don’t fuzz up the carpet nap. Test a hidden spot first here too, since factory carpet dye isn’t always colorfast.
Ten minutes per front footwell. Clean mats sitting on a dirty floor is how the stains come right back.
17. Floorboards That Never Fully Dried Out
When slush melts off four pairs of boots week after week, the padding under the carpet holds moisture long after the surface feels dry. Press down with a thick bath towel and stand on it, moving to a dry section each time, until the towel stops picking up water.
Then park in the garage, crack the windows, and run the defroster with the AC on for 10 minutes to pull humidity out of the cabin. A DampRid tub, $6 to $8 at Walmart, left on the floor overnight, finishes the job.
Don’t aim a space heater into a closed car or hold a hair dryer against carpet backing. Low, steady airflow dries it; heat just warms the damp.
Your Car Can Feel Clean Again
Winter is hard on a car, and those crumbs wedged in the console gap or the salt crust creeping up the floor mats aren’t a sign you’re behind. They’re just what happens when boots, snacks, and car seats collide for months on end. None of it needs a professional fix.
Pick the zone that bugs you most, grab what’s already under your sink, and give it ten minutes. Most car interior cleaning goes faster than the drive to a detail shop, and these car cleaning tips hold up right through March.