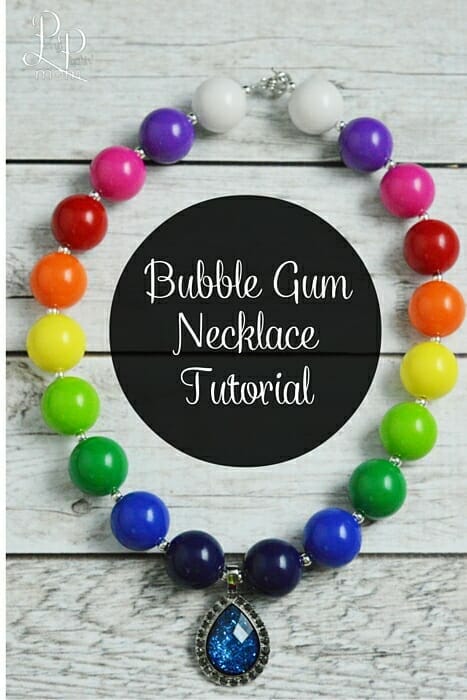
Bubblegum Necklaces are all the rage for little girls right now! I know my daughter has dozens. But, they can be expensive!
I decided to make my own bubblegum necklace for my daughter. I actually found a discount on beads at my local store (sorry – hyper local so not able to share where you can buy). Now, I can make them whenever I want (and in any color or theme I want).
This would actually be a fun activity for a birthday or slumber party too! You might even invite the girls over for Thirsty Thursday and make your own necklaces!
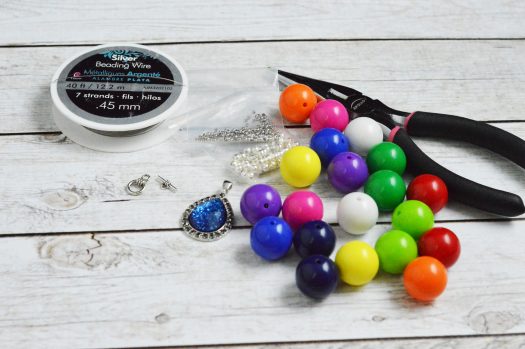
SUPPLIES
(20) 20 mm bubblegum beads
(22) 4mm silver spacer beads
.45 mm coated beading wire
(2) crimp beads
Toggle clasp
Pendant of choice
Wire cutters
Small pliers
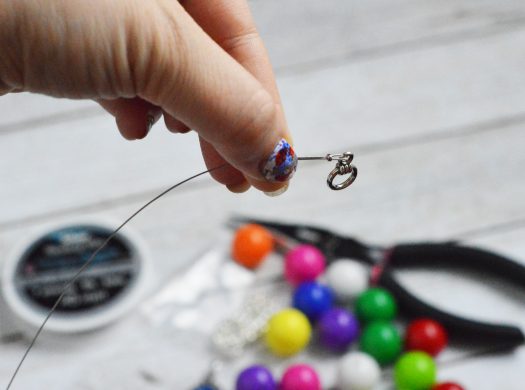
Cut approximately two feed of the coated beading wire. Hold the wire between your thumb and finger and silde on a crimp bead and then put on one half of your toggle clasp. Slide the wire back through the crimp bead, ensuring the toggle clasp is looped in.
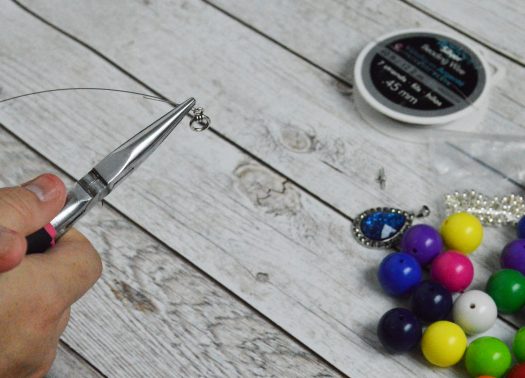
Leave about a quarter of an inch of space between the crimp bead and the toggle clasp, as shown in the picture above. Keep holding the wire, and squish the crimp bead with your pliers to smash it completely. This will be the start of your necklace. Now you’re ready to start beading!
Add the beads in the pattern you want. We placed the center gem on first. Then, added a large bead followed by smaller spacer beads. Repeat the pattern of your choice until the enter necklace is created (both sides if you are using something specific for the center of the necklace).
Once you have all the beads on your necklace (remember to end with a silver bead), you will slide on a crimp bead, and then the other half of the toggle clasp.
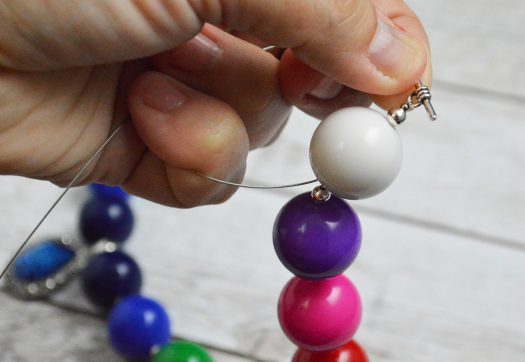
This time, when you run the wire back through the crimp bead, you will also need to run it through the silver bead, and the first plastic bead too (as shown above.)
Hold onto the toggle clasp, and tug on the beading wire until everything is tight. Make sure there are no gaps between any of the beads at ALL before you crimp the crimp bead.
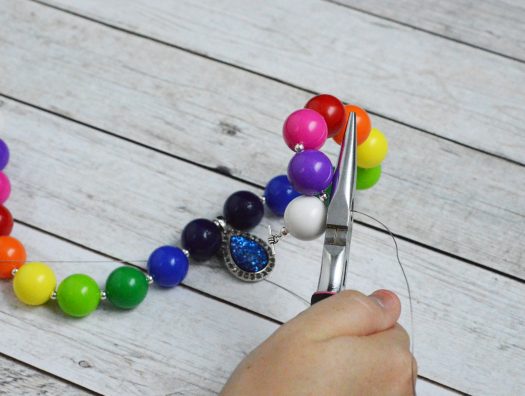
Once you’re sure everything is tight, use your pliers and crimp the crimp bead tightly.
Once you have the crimp bead squished, use your wire cutters to get as close to the plastic bead as possible, and clip the wire. Once you’ve clipped the wire, be sure to tuck the little piece into the hole of the next bead, so the wire doesn’t stick out and scratch your neck when wearing it.
Ta-Dah! Now you’ve made your own, totally custom necklace! Warning…these are addicting! I’ve made far too many already, and don’t have any plans of stopping anytime soon! Happy creating!
