Another long December afternoon stretching ahead, and you need something that keeps everyone busy without losing your kitchen. Those $30 gingerbread kits buy you twenty minutes and an argument. I spent one Christmas trying to supervise three kids fighting over one roof panel and swore there had to be a better way.
These 22 projects turn dessert-making into the actual activity. Graham Cracker Houses cost $8 and forgive wobbly walls. A Hot Cocoa Bar runs itself for two hours while kids customize mugs, and Snowman Cupcakes with assembly-line jobs give each kid a real task. The dessert is just proof you survived the afternoon together.
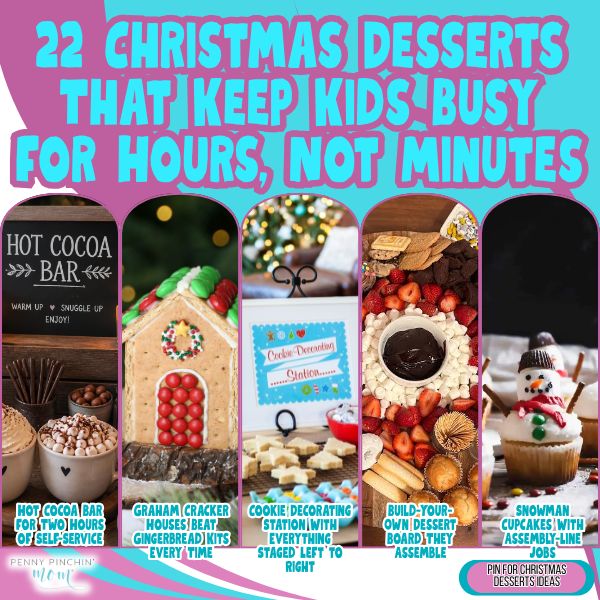
1. Hot Cocoa Bar for Two Hours of Self-Service
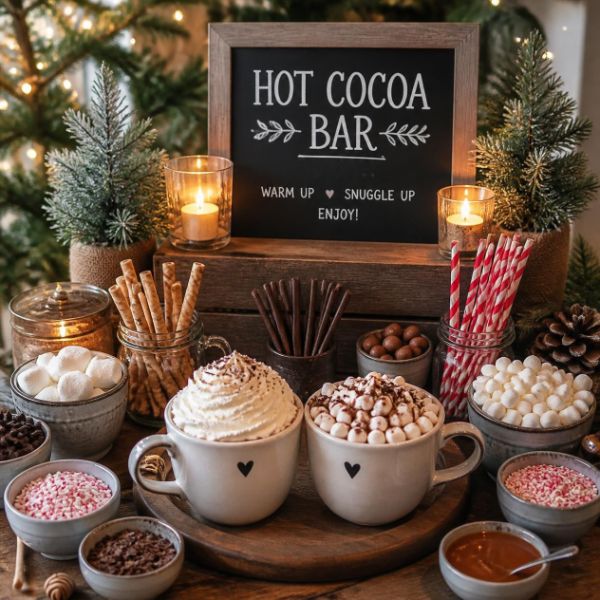
Set up stations in order: mugs at the start, cocoa packets or mix next, hot water in a slow cooker (adults only), then all the toppings spread across the counter. Mini marshmallows, crushed candy canes, whipped cream, chocolate chips, and those $1.25 packets of peppermint sticks from Dollar Tree. The whole setup comes in under $12 and keeps kids coming back for refills and remix attempts. They’ll make a cup, drink half, come back for different toppings, make another cup. Put parchment paper under the topping station so you can gather the edges and dump the mess later.
2. Graham Cracker Houses Beat Gingerbread Kits Every Time

A box of graham crackers comes to $3.50 versus a $30 gingerbread kit with six pieces and not enough icing. You get the same activity for less money and way less stress. Use store-bought white frosting as your mortar (around $2), let it set for ten minutes between walls, and the structure actually holds. Kids can build whatever size house makes sense for their patience level. One kid might build a mansion while another makes a dog house, and both work. The crackers break clean along the perforations, so younger kids can handle them without everything crumbling.
3. Cookie Decorating Station With Everything Staged Left to Right
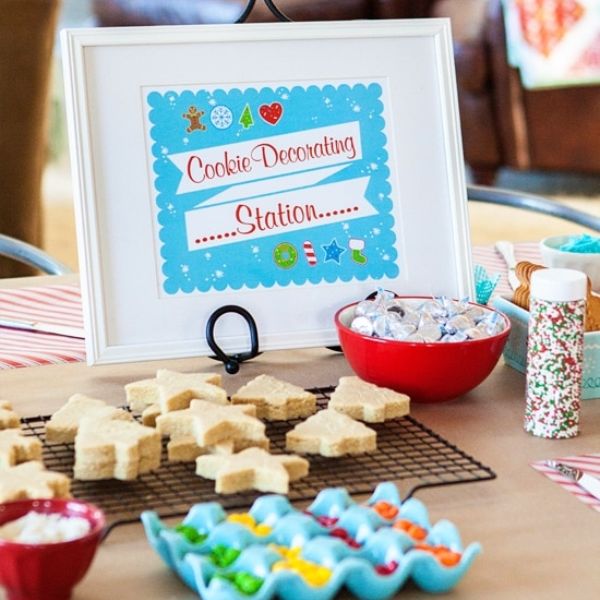
When my kids were little, I learned to set this up in order: plain cookies on the left, frosting and spreading knives next, then sprinkles and candies in small bowls, finished cookies go on a tray at the far right. Kids move down the line naturally without asking what comes next. A batch of 24 sugar cookies totals around $4 to make (flour, sugar, butter, eggs), plus maybe $6 for frosting and sprinkles. One tray per kid stops the elbow fights. Put their name on a piece of masking tape on their tray, and they’ll protect their territory like tiny bakers.
4. Build-Your-Own Dessert Board They Assemble
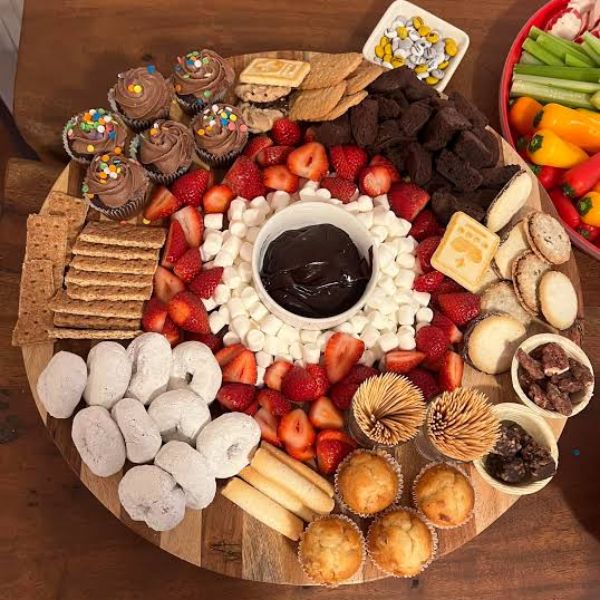
Spread parchment paper across your table and let the kids arrange a dessert board right on the surface. Set out store-bought cookies ($3), pretzels ($2.50), chocolate chips ($3), sliced fruit you already have, and any other snacks taking up space in your pantry. They spend forever deciding what goes where, then longer arranging it to look pretty, then they graze on it for the rest of the afternoon. No plate to wash later. The whole thing comes to maybe $10 if you’re buying from scratch, less if you’re using pantry odds and ends. Take a photo before they destroy it because they will destroy it fast.
5. Snowman Cupcakes With Assembly-Line Jobs

Bake cupcakes from a $1.50 box mix plus eggs and oil (under $4 total for 24 cupcakes). Set up three stations: one kid frosts, one adds the mini marshmallow head, one does the face with chocolate chips and a pretzel stick scarf. Each kid gets a real job; nobody’s waiting around getting bored. They’ll decorate faster than you’d do it alone, and the crooked faces make them better. Let the occasional melted snowman or pre-decorated snack happen without a fight.
6. Candy Cane Reindeer With Individual Focus
Push a mini peanut butter cup (or allergy-safe chocolate) onto the curved end of a candy cane, add googly eyes with dabs of frosting, break a red M&M in half for the nose, twist a small piece of brown pipe cleaner for antlers. They look cute and take individual focus, which means kids stay busy. A 12-count box of candy canes costs $2, mini peanut butter cups are around $4, and you probably have the rest. Makes 12 reindeer. Younger kids will need help with the pipe cleaner antlers, but they can handle everything else.
7. Peppermint Bark They Break Apart Themselves
Melt a 12-ounce bag of white chocolate chips ($3) in the microwave, stir in half a cup of crushed candy canes (about $1.50 for a box), spread it on a parchment-lined baking sheet, and let it set in the fridge for 30 minutes. Then the fun part: kids get to break it into pieces with their hands. No two pieces look the same, and they feel like they’re making actual candy. The whole batch comes in under $5 and makes around 24 pieces depending on how big they break them. Put out a muffin tin so they can sort pieces by size if you need to stretch the activity even longer.
8. Pretzel Rods Dipped Six Different Ways
For about $8, you get an hour of focused dipping and decorating. Melt chocolate chips (milk, dark, or white) in separate bowls. Kids dip pretzel rods halfway, then roll them in whatever toppings you set out: crushed candy canes, sprinkles, mini chocolate chips, coconut. Lay them on parchment paper to set. The dipping is fast, but deciding what toppings to use takes forever, and younger kids will want to make one of each kind. Makes around 20 dipped pretzels. The ones that get double-dipped or covered entirely in sprinkles are always the favorites.
9. Rice Krispies Treats Cut Into Christmas Shapes
Make a basic batch (one box of cereal around $4, marshmallows about $2.50, butter you have) and press it into a 9×13 pan. Let it cool for 20 minutes, then kids use cookie cutters to punch out trees, stars, stockings, whatever shapes you have. They’ll re-press the scraps and cut more shapes until there’s nothing left but crumbs they eat standing at the counter. Frost the shapes with store-bought green frosting and add sprinkles for ornaments. I spend about $8 total and get around 20 shapes depending on size.
10. Oreo Cookie Balls Rolled by Committee
Kids who need to work out some energy love this one. Crush an entire package of Oreos ($4) in a food processor or let the kids smash them in a zip-top bag with a rolling pin (more entertaining). Mix in one 8-ounce block of cream cheese ($2.50), let the kids roll the mixture into balls, then dip them in melted chocolate ($3). Roll the dipped balls in crushed candy canes or sprinkles before the chocolate sets. Makes around 36 balls. The rolling takes forever because they’ll want them all to be perfect spheres. Put out toothpicks for dipping so their hands stay cleaner.
11. Decorating Competition With Actual Categories
Give each kid identical supplies: three sugar cookies, one small bowl of frosting, one spoon of sprinkles. Set a timer for 15 minutes. When it goes off, you judge categories: Most Colorful, Neatest, Wildest Design, Best Use of Sprinkles. Everyone wins something. The competition element makes them focus harder than they would for regular decorating, and the categories let you find something positive about everyone’s work. Works best with kids ages five and up who understand that winning a made-up category is different from winning an actual prize. The cookies cost about $4 for a batch, plus maybe $3 for decorating supplies.
12. Cinnamon Applesauce Ornaments for Two-Day Projects
Mix one cup of applesauce with one cup of cinnamon (you’ll spend around $4 total if you’re buying a new cinnamon container). Roll it out, cut shapes with cookie cutters, poke a hole at the top with a straw, and let them dry for 48 hours, flipping once. They smell incredible and keep kids busy with rolling, cutting, and hole-poking. These aren’t for eating, but they’re made of food and smell amazing. Thread ribbon through the holes and hang them on the tree or give them as gifts. Makes about 15 ornaments. The drying time means this becomes a two-day activity, which is even better if you need back-to-back afternoon solutions.
13. Chocolate-Covered Spoons for Cocoa Gifts
When you need a gift-making activity that doubles as dessert prep, this one delivers. Melt chocolate chips in the microwave ($3 for a bag), dip plastic spoons about halfway up the handle, lay them on parchment paper, and add sprinkles or mini marshmallows before the chocolate sets. Kids can make these as gifts for teachers or grandparents. A bag of 50 plastic spoons costs around $2 at Dollar Tree. Each spoon takes individual attention, and kids will make samples for themselves to test the quality. Wrap each one in a small cellophane bag with a ribbon, and suddenly you have hostess gifts that cost 30 cents each.
14. Brownie Batter Truffles With No Baking
Mix one box of brownie mix ($1.50) with 4 ounces of cream cheese ($1.25). Don’t add the eggs or oil the box calls for. Just the dry mix and the cream cheese. Kids roll the mixture into balls, then roll those balls in powdered sugar ($2) or cocoa powder. The mixture is thick and takes effort to roll, which means it keeps their hands busy. Makes around 24 truffles for under $5 total. They taste like raw brownie batter, but they’re safe to eat because there’s no raw egg. Store them in the fridge, where they’ll last about four days if your kids don’t find them first.
15. Sugar Cookie Puzzle Pieces They Decorate Then Trade
Roll out sugar cookie dough and cut it into 3-inch squares. Use a knife to cut each square into two puzzle pieces before baking (figure on around $4 for a batch of 24 pieces, makes 12 puzzles). After they cool, each kid decorates their puzzle pieces however they want. Then they trade pieces with siblings and try to fit different designs together. The decorating costs about $3 for frosting and sprinkles. The trading and puzzle-solving extends the activity another 20 minutes after the decorating is done. Some pieces won’t fit together perfectly because cookies spread differently, and that frustration becomes part of the game.
16. Peanut Butter Snowballs Rolled in Three Coatings
Mix 2 cups of peanut butter ($3) with 2 cups of powdered sugar ($2 for a bag) and 1 cup of crushed graham crackers (about $1). Kids roll the mixture into balls, then roll those balls in either powdered sugar, cocoa powder, or crushed candy canes. Set up three stations with the different coatings so each kid can claim a specialty. Makes about 30 snowballs for under $7 total. The mixture is stiff enough that younger kids can roll neat balls without them falling apart. These don’t need to be refrigerated, so you can leave them out for grazing all afternoon.
17. Marshmallow Pops Dipped and Decorated
Push a lollipop stick into a large marshmallow (a bag of 24 marshmallows costs around $2.50, sticks are $1.25 at Dollar Tree). Dip the marshmallow in melted chocolate ($3 for a bag), then immediately roll it in sprinkles, crushed cookies, or mini chocolate chips before the chocolate sets. Lay them on parchment paper. Kids can make these as fast or as slow as they want, and the mess is contained to one parchment sheet. Makes 24 pops for under $8 total. The ones that get double-dipped in chocolate always fall off the stick, and that teaches them to quit while they’re ahead.
18. Cereal Wreaths With Minimal Cooking
Melt 3 tablespoons of butter with a 10-ounce bag of marshmallows ($2.50 total), stir in 6 cups of corn flakes ($3 for a box), add green food coloring, and let kids form the mixture into wreath shapes on parchment paper while it’s still warm. Add red candies for berries. The mixture cools fast, so this becomes a race to shape them before they harden. Makes about 12 wreaths for under $6 total. Your kids’ hands will be sticky and green, which they’ll think is hilarious. Give them each a damp washcloth before they touch anything else.
19. No-Bake Cheesecake Cups They Build in Layers
Give each kid a clear plastic cup. They build layers: crushed graham crackers on the bottom ($3.50 for a box), then a spoonful of no-bake cheesecake filling (8 ounces cream cheese plus 2 tablespoons sugar and a splash of vanilla, about $3 total), then canned cherry pie filling on top ($2.50). The layering goes slowly because they want each layer to look even through the side of the cup. Makes 8 cups for under $10 total. The cups need to chill for at least an hour before eating, which means you can hand them out after dinner and pretend you planned.
20. Peppermint Pinwheel Cookies They Roll Themselves
Make two batches of sugar cookie dough, leave one plain and dye one red. Chill both for 30 minutes. Roll each color into a rectangle, stack the red on top of the white, roll the whole thing into a log, and slice it into pinwheels. The rolling and slicing keeps kids focused, and the pinwheel effect looks impressive even when they’re sloppy. Two batches of dough cost around $6 total (flour, sugar, butter, eggs, food coloring). Makes about 36 cookies. Bake at 350°F for 10 minutes. The red dye will stain their hands, so warn them before they start or just accept it as temporary Christmas tattoos.
21. Containment Setup Before You Start Anything
Before anything else, lay parchment paper on the table, one tray per kid, aprons or old shirts on everyone. This isn’t a recipe. It’s the structure that makes every other item on this list survivable. Kids know their work zone, the mess stays contained, and cleanup is rolling up the parchment and throwing it away. I spend maybe $3 for a roll of parchment paper that lasts for months. I learned this after one too many afternoons spent scraping frosting out of the table’s grooves. Now the parchment goes down first, before I even get out ingredients.
22. Chocolate Dipped Candy Cane Cookies With One Job Each
Set up an assembly line: one kid breaks candy canes into a bowl ($2 for a box), one kid stirs crushed candy canes into basic cookie dough ($4 for a batch), one kid rolls the dough into balls and flattens them on the baking sheet. After baking and cooling, everyone dips the cookies halfway into melted chocolate ($3). The assembly line keeps all three kids working at once with no waiting. Makes about 24 cookies for under $10 total. The kid who breaks the candy canes will try to eat the dust at the bottom of the bowl. This is not worth fighting about.
You Just Bought Yourself the Whole Afternoon
Your December afternoon stretching ahead doesn’t have to end in kitchen chaos or a $30 kit that bought you twenty minutes. These projects turn the mess into the point, and the dessert into proof you all made it through together.
Start with Graham Cracker Houses if you need something forgiving, try the Hot Cocoa Bar if you want two hours of self-directed activity, or set up Snowman Cupcakes with assembly-line jobs when everyone needs a real role. The frosting will end up in places frosting shouldn’t go. Someone will eat more candy than they decorate. But you’ll have hours filled, hands busy, and desserts that taste better because they made them.
Your December afternoon just got easier. Pick one project and see how long it lasts.