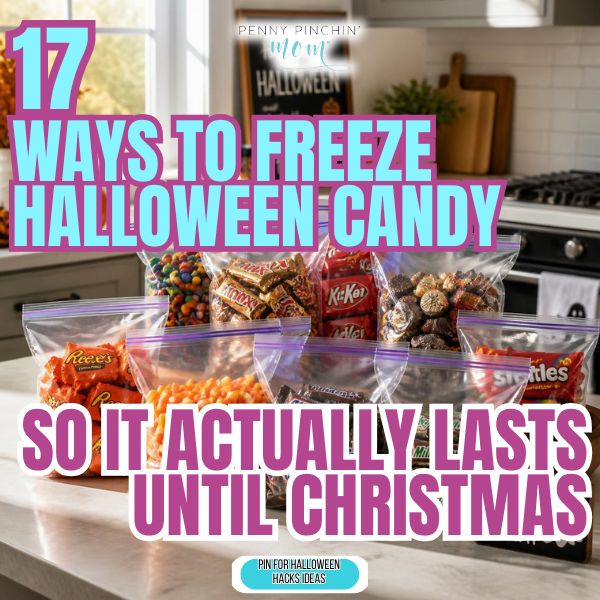
November 1st hits, and you’re staring at bags of candy you spent $40 on, knowing half will go stale by Thanksgiving. When my kids were little, they’d hoard their Halloween haul until Easter, and I’d find melted, sad chocolate stuck to the bottom of their baskets.
But your freezer changes everything. Frozen Peanut Butter Cups taste like fudge, Kit Kat Bark Pieces stay crispy for months instead of days, and Butterfinger Crumbles become the ice cream topping you’d pay $6 for at the store. These 17 treats transform that candy mountain into portion-controlled snacks that actually last until the holidays.
1. Frozen Peanut Butter Cups
Unwrap a bag of mini peanut butter cups (about $4 for a 10-ounce bag) and toss them in a freezer-safe container. The chocolate firms up and the peanut butter turns into a creamy, fudge-like center that takes longer to eat. They’re perfect for those moments when you need just one piece of candy to feel satisfied instead of mindlessly eating five. The frozen texture makes them feel more substantial, so you slow down and enjoy them. Store them in a labeled container so nobody mistakes them for regular candy and eats them all before you get your share.
2. Kit Kat Bark Pieces
Break apart those fun-size Kit Kats (a $5 bag) into individual sticks and freeze them flat on a parchment-lined baking sheet. Once frozen, transfer them to a freezer bag. The wafer layers turn extra crispy and the chocolate snaps when you bite into it. My grandkids love these because they feel like eating fancy frozen chocolate bars. Pop one in your mouth and let it melt slowly, or crunch right through for that satisfying texture contrast. These last about three months in the freezer if you hide them behind the frozen vegetables.
3. Butterfinger Crumbles
When you want an ice cream topping without paying store prices, grab a bag for about $4 and smash up the snack-size bars while still in their wrappers. The peanut buttery layers turn even crunchier when frozen, and they don’t stick to your teeth as much. Use them as ice cream topping, mix into yogurt, or just eat them straight from the freezer with a spoon. The chocolate coating stays perfectly crispy instead of getting that weird sticky texture room-temperature Butterfingers sometimes have. Store the pieces in a container, and they’ll last for months.
4. Milky Way Slices
Cut fun-size Milky Ways (picked up for around $5 per bag) into thin coins before freezing. The caramel stays chewy but becomes thick and slow-melting, while the nougat firms up just enough to hold its shape. Line them up on parchment paper, freeze for an hour, then store in a container with wax paper between layers so they don’t stick together. These work great when you want something sweet but don’t want to commit to eating an entire candy bar. One or two slices satisfy that chocolate craving without overdoing it.
5. Frozen Candy Corn Mix
For those days when you need portion control, measure out candy corn (comes in under $3 for a bag) into small snack bags and freeze them. The sugar coating hardens and crunches, turning each piece into a tiny frozen bite that takes effort to chew through. This slows you down so you’re not mindlessly grabbing handfuls. Mix them with frozen peanuts or chocolate chips if you want something more interesting. The freezing process somehow makes candy corn less cloyingly sweet and more refreshing. Keep them in individual portions so you’re not tempted to eat the whole bag in one sitting.
6. Reese’s Pieces Trail Mix
Combine Reese’s Pieces (I spend about $3 for an 8-ounce bag) with pretzels and peanuts in a freezer bag. The candy shells turn extra crunchy and the peanut butter inside stays creamy but cold. This became my go-to afternoon snack because the salty-sweet combo feels more like real food than just eating candy. The frozen peanuts and pretzels stay perfectly crunchy, and everything stays separated instead of getting sticky. Portion it out into small containers before freezing so you can grab one serving instead of eating straight from the bag. The whole mix totals under $8 and lasts weeks.
7. Snickers Chunks
For anyone who goes through candy like it’s going out of style, try cutting Snickers bars (about $5 for a bag of fun-size) into bite-sized chunks and freezing them. The caramel and nougat become dense and chewy, while the peanuts stay crunchy. Each piece takes longer to eat because you have to let it soften slightly in your mouth. Store them in a container and shake it occasionally so they don’t freeze into one solid mass. These work perfectly for portion control since you can grab exactly three pieces instead of eating an entire bar without thinking.
8. M&M Cookie Dough Bites
Mix leftover Halloween M&Ms (using $4 worth of M&Ms) into edible cookie dough portions and freeze them in ice cube trays. The candy shells crack when you bite into the frozen dough, and the chocolate centers stay soft. Pop one cube out whenever you need something sweet without baking an entire batch of cookies. The dough stays scoopable even frozen, so you can eat it straight from the tray with a spoon. This uses up those random M&M colors nobody wanted on Halloween night and turns them into something that feels like a special treat.
9. Frozen Almond Joy Squares
Cut Almond Joy bars (runs about $5 for a bag) into squares and freeze them on parchment paper. The coconut filling becomes firm and almost truffle-like, while the almonds stay crunchy and the chocolate coating snaps cleanly. These feel way fancier than regular Halloween candy, perfect for when you want something that tastes expensive. Store them in layers with wax paper between so they don’t stick together. I keep these for myself and don’t tell anyone where they’re hidden because they disappear too fast otherwise. One square satisfies the sweet tooth without needing to eat multiple pieces.
10. Twix Ice Cream Toppers
Break Twix bars (costs around $5 per bag) into small pieces and freeze them in a jar. The caramel layer becomes thick and chewy, the cookie stays crispy, and the chocolate coating cracks perfectly when you bite down. Sprinkle them over ice cream, brownies, or just eat them straight from the jar when nobody’s looking. The frozen cookie layer is the real winner here because it doesn’t get soggy like it might at room temperature. These last about two months in the freezer, though they’ve never survived that long at my house. Keep the jar sealed tight so they don’t absorb freezer smells.
11. Starburst Chews
Unwrap Starbursts (around $3 for a bag) and freeze them individually on a baking sheet before transferring to a container. The fruit flavor intensifies, and they turn into these hard little chews that take forever to soften in your mouth. This makes a two-second candy last five minutes, which is exactly what you need when you’re trying not to eat an entire bag. The texture changes completely from sticky-chewy to firm-chewy, almost like taffy. Sort them by color first if you want to save only the good flavors. Store them in a container with a lid because they’ll pick up freezer odors otherwise.
12. Frozen Tootsie Roll Bites
Kids go crazy for these. Cut regular Tootsie Rolls (I spend about $3 for a bag) into coin-sized pieces and freeze them. The chocolate firms up but stays chewable, and somehow tastes richer when frozen. These work perfectly for portion control because each little disc feels substantial enough to count as a treat. Layer them with wax paper so they don’t stick together in one frozen mass. The best part is they don’t melt in your hand while you’re eating them, so there’s no chocolate-covered fingers to deal with. Keep them in a sealed container, and they’ll stay fresh for months.
13. Three Musketeers Mousse Bites
Cut Three Musketeers bars (a $5 bag) into small cubes and freeze them on parchment paper. The whipped filling turns into this dense, mousse-like texture that’s completely different from room-temperature candy. The chocolate coating cracks cleanly and the nougat center melts slowly in your mouth. These became my favorite because they feel lighter than other frozen candy bars, even though they’re just as satisfying. Transfer them to a container once frozen and keep them away from strong-smelling foods. One or two pieces handle a chocolate craving without feeling like you overdid it.
14. Frozen Skittles
Dump a bag of Skittles (totals about $3) into a freezer container and shake them up every few hours as they freeze. The hard candy shell becomes even harder and the chewy center firms up enough that each piece lasts longer. These work great for movie nights because you can’t mindlessly toss back handfuls when they’re frozen solid. Let them sit in your mouth for a minute before chewing, or you’ll hurt your teeth. The fruit flavors taste more intense when frozen, almost like eating tiny popsicles. Store them in a sealed container so they don’t stick together into one giant Skittles mass.
15. Caramel Apple Sucker Pieces
If your bathroom counter looks like a candy store exploded after Halloween, try this. Break caramel apple suckers (comes in under $5 for a bag) into chunks with a hammer while they’re still wrapped. Remove the wrappers, freeze the pieces on parchment paper, then store in a container. The caramel and tart apple layers firm up and crack when you bite them instead of sticking to your teeth. These feel more like hard candy than lollipops when frozen, and one piece lasts way longer than you’d expect. Keep them separated with wax paper, or they’ll freeze into one solid block.
16. Frozen Junior Mints
Junior Mints straight from the freezer (about $1.50 for a theater box) are a completely different candy. The chocolate coating becomes hard and snappy while the mint cream inside stays soft and cool. Pop them in your mouth one at a time and let them melt slowly for that refreshing mint-chocolate combo. These work perfectly after dinner when you want something sweet but not heavy. Transfer them from the box to a freezer bag so they don’t absorb other food smells. They’ll last months in the freezer, though mine never make it past two weeks.
17. Whoppers Frozen Mix
Combine Whoppers (about $3 for a bag) with frozen chocolate chips and peanuts in a container. The malted milk balls turn extra crunchy, and the chocolate coating doesn’t get that weird white coating it sometimes develops at room temperature. The mix gives you variety, so you’re not just eating one type of candy over and over. Shake the container before each use so everything stays distributed. The malted center stays light and crispy even frozen, making these feel less heavy than solid chocolate candy. Portion into small bags if you need help with self-control.
Turn Halloween Overflow Into Months of Treats
That $40 candy pile doesn’t have to become a guilt trip or a sticky mess by Thanksgiving. You’ve got options now that keep those treats good for months instead of letting them turn into basket-bottom casualties.
Start with Frozen Peanut Butter Cups if you want that instant fudge fix, try Kit Kat Bark Pieces when you need a crunchy snack that lasts, or make Butterfinger Crumbles when you’re tired of paying $6 for ice cream toppings. Your freezer just turned Halloween overflow into portion-controlled treats that’ll carry you through the holidays without waste. You spent that money. Now you get to enjoy it on your terms, one frozen piece at a time.