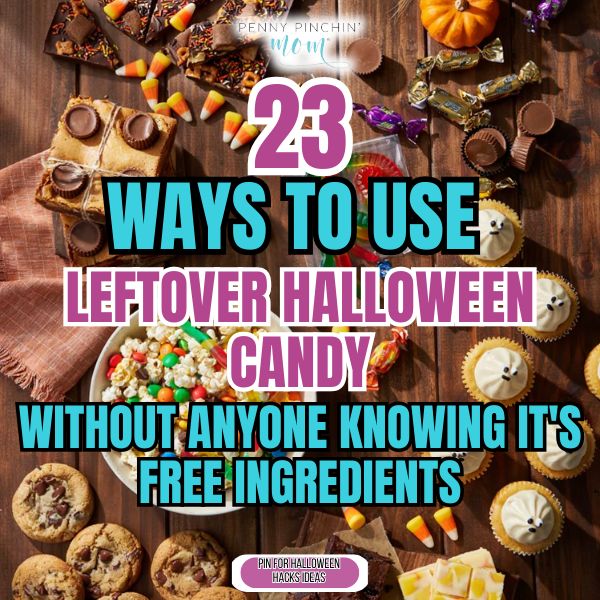
That giant bowl of Halloween candy stares at you from the counter. You’re tired of sneaking mini Snickers for breakfast, but throwing away perfectly good candy feels wrong when groceries cost this much.
Freeze it now so you have free baking supplies through Christmas. Chop it into Trail Mix that costs half what the store charges. Turn movie night into a Candy Board that feels special. You’ll skip spending another $15 at the theater. Your kids won’t believe candy can go into pancakes, and you’ll finally stop feeling guilty about that overflowing bowl.
1. Freeze for Emergency Baking Stash
Most chocolate candy bars last 8-12 months in the freezer without losing flavor. I toss mine in a gallon freezer bag labeled with the date and pull them out whenever a recipe calls for chocolate chips. Snickers chopped up in brownies tastes just as good as fancy baking chocolate, and you’re using what you already have instead of buying more. Those mini Milky Ways I froze last year saved me a trip to the store when I needed chocolate for cookies at midnight. Keep the bag in the back of your freezer so you’re not tempted to snack through your baking stash.
2. Trail Mix Upgrade
Your kids’ boring trail mix gets a serious upgrade when you chop up leftover candy and stir it in. Mix M&Ms, broken Reese’s cups, and chopped Snickers with regular trail mix from Walmart (about $3 for a big container) and suddenly everyone’s fighting over the last handful. Pack it in sandwich bags for road trips, after-school snacks, or hiking. The candy makes the healthy stuff like nuts and raisins way more appealing to picky eaters. Just don’t tell them they’re still eating nuts.
3. Hot Chocolate Topper Bar
Set out bowls of crushed candy bars, peppermint patties, and fun-size chocolate pieces next to your hot chocolate station. Kids love customizing their own mugs, and you’re clearing out that candy bowl without anyone noticing. Add mini marshmallows for about $2, and suddenly leftover Halloween candy turned into a special winter treat that lasted us through January. Crush the harder candies in a zip-top bag with a rolling pin so they melt into the hot chocolate instead of sinking to the bottom.
4. Bake Directly Into Cookie Dough
When those sugar cookies need something extra, press mini candy bars into the top before baking. The candy melts slightly and creates these pockets of caramel or peanut butter that make regular cookies feel special. Use whatever candy’s leftover, roughly one piece per cookie, which means you’re not buying chocolate chips for around $4 at the store. Reese’s cups, Rolos, and mini Snickers work best because they’re the right size and don’t burn. Just add them when the cookies have about 2 minutes left so they soften but don’t completely melt away.
5. Movie Night Candy Board
Arrange leftover candy on a serving tray with popcorn in the middle for family movie nights. It feels like a special event; you’re using up the candy stash instead of letting it go stale, and everyone gets to pick their favorites without fighting over the bag. Throw in some pretzels or crackers (under $3 total) to balance out the sugar, and suddenly Friday night looks like you planned something fancy. The candy disappears faster this way because it’s front and center instead of forgotten in the pantry.
6. Math Lessons Without the Eye Rolls
My grandkids wanted to practice addition when M&Ms were involved. Sorting candy by color, counting pieces, and making patterns keeps elementary-age kids busy for 20-30 minutes, and you’re depleting that Halloween stash while they learn. Older kids can practice fractions by dividing candy into equal groups or calculating percentages of each color. When they finish their “homework,” they get to eat their math manipulatives, which beats those boring plastic counters teachers send home. Just set a limit on how many pieces they can eat so you’re not dealing with a sugar crash.
7. Candy Bark for Teacher Gifts
Melt chocolate chips (or leftover chocolate bars) on a parchment-lined cookie sheet, press in crushed candy pieces, and let it harden. Break it into chunks, wrap in cellophane bags from Dollar Tree ($1.25 for a pack), and suddenly you have homemade teacher gifts or holiday presents that cost under $5 total. I made six gifts last year from candy we already had plus one bag of melting chocolate for around $3. The fancy presentation makes people think you spent way more effort and money than you did. Store finished bark in the fridge so it doesn’t get soft.
8. Pancake and Waffle Mix-Ins
Chop up chocolate bars and stir them into your pancake batter before cooking. The chocolate melts into these little pockets that make weekend breakfast feel special without buying anything extra. Mini Reese’s cups work especially well because the peanut butter adds flavor you can’t get from regular chocolate chips. Use about 3-4 chopped fun-size bars for a batch that serves a family of four. Just don’t flip the pancakes too early or the melted candy makes them stick.
9. Coffee and Cocoa Stirrers
Peppermint patties, Andes mints, or mini chocolate bars stirred into hot coffee create a flavored drink that rivals those $6 coffeehouse versions. The chocolate melts slowly and sweetens your coffee while adding flavor. Keep a small bowl of these candies next to the coffee maker instead of buying flavored syrups for around $4-5 each. One fun-size bar is enough for a full mug, so your leftover candy stretches pretty far. This works for afternoon cocoa too when you need something warm but don’t want to brew a whole pot of coffee.
10. Ice Cream Topping Bar
Chop leftover candy and set it out with ice cream for DIY sundaes. You’re using up the Halloween stash instead of buying those ice cream toppings that run $3-5 per jar at the store. Snickers, Reese’s, Butterfingers, and M&Ms all taste better on ice cream than they do straight from the bag anyway. Put out 4-5 bowls of different chopped candy, and everyone builds their own sundae exactly how they want it. The candy seems more special when it’s part of sundae night instead of just random snacking.
11. Yogurt Parfait Layers
Layer crushed candy bars with plain yogurt and granola to turn a healthy breakfast into something kids eat. The yogurt costs about $4 for a big container at Walmart, granola comes in at around $3, and you’re using candy you already have. Three layers in a clear cup look fancy enough for brunch but take maybe 2 minutes to assemble. The contrast between plain yogurt and sweet candy means you’re not loading them up with as much sugar as straight candy would be. Just crush the candy into small pieces so every bite has a little flavor.
12. Cake and Cupcake Surprise Centers
Push a mini candy bar into the center of cupcake batter before baking for a melted surprise inside. When my kids were little, these “lava” cupcakes made every birthday feel special without buying fancy ingredients. The candy melts during baking and creates a gooey center that makes regular box mix (under $2) taste expensive. Rolos and Reese’s cups work best because they’re the right size and melt smoothly. Just don’t tell anyone it’s leftover Halloween candy until after they rave about how good they are.
13. Milkshake Mix-Ins
Blend leftover candy with ice cream and milk for thick milkshakes that taste like you went to a fancy ice cream shop. Use about 3-4 fun-size bars per shake, which costs nothing because it’s candy you already have, versus buying a $5-6 milkshake per person. Snickers makes a caramel shake, Reese’s creates peanut butter flavor, and crushed Butterfingers taste just like the DQ version. The candy blends smoother if you chop it first, and you can mix different types for custom flavors kids invent themselves.
14. Candy Butter for Toast
Melt chocolate candy with a tablespoon of butter and spread it on toast or waffles. It’s homemade Nutella made from candy you’re trying to use up instead of buying a $6 jar at the store. Use about 5-6 mini bars with 2 tablespoons butter for a small batch that keeps in the fridge for a week. Reheat it gently in the microwave when it gets too firm to spread.
15. Granola Bar Upgrade
Press chopped candy into homemade granola bar mixture before it sets, or melt chocolate candy and drizzle it over store-bought granola bars. Either way, you’re using up Halloween leftovers and making boring granola bars more appealing for lunch boxes. Store-bought granola bars run about $3-4 for a box, and adding your leftover candy makes them feel more like a treat than a healthy snack. The candy pieces bake right into homemade versions and stay chewy instead of getting hard. Just wrap finished bars individually, so they stay fresh longer.
16. Candy Popcorn Coating
Melt candy bars and drizzle over freshly popped popcorn for a sweet and salty snack that clears out your candy bowl fast. Plain popcorn costs under $2 for a jar of kernels that makes dozens of batches, and your leftover candy becomes the fancy coating instead of buying caramel corn for $4-5. Use about 6-8 fun-size bars melted together for one big bowl of popcorn, spread it on parchment paper to cool, and break it into chunks. Reese’s, Snickers, and plain chocolate all work, and mixing different types creates new flavor combinations nobody expected.
17. Brownie Batter Swirl
Chop candy into small pieces and fold them into brownie batter right before baking, or press whole mini bars into the top so they sink slightly during baking. The candy creates pockets of caramel, peanut butter, or extra chocolate that make box mix brownies (under $2) taste homemade and fancy. Save Milky Ways and Snickers for this because the caramel stays gooey even after the brownies cool. Just don’t overbake them or the candy pieces get too hard.
18. Plain Oatmeal Fix
When plain oatmeal isn’t cutting it anymore, stir in chopped candy pieces while the oats are still hot. The chocolate melts slightly and creates a sweetened breakfast that costs nothing extra since you’re using candy that’s already sitting around. Reese’s cups turn it into peanut butter oatmeal, and chopped Snickers add caramel flavor that makes instant oats taste less boring. You’ll spend about $2 for a container of quick oats that makes 10-12 servings, and the candy transforms each bowl into something kids finish. Two fun-size bars per serving is enough to add flavor without turning breakfast into pure sugar.
19. Candy Apple Nachos
Slice apples and arrange them on a plate, then drizzle with melted candy and sprinkle chopped pieces on top. This takes maybe 5 minutes to throw together, and suddenly healthy snack time looks like a special treat. Melt 4-5 mini chocolate bars in the microwave for 30 seconds, drizzle over apple slices from a bag that costs about $4, and kids demolish them. The combination of tart apple and sweet chocolate works better than eating the candy straight. Mini Rolos create a caramel apple effect, and crushed peanut butter cups add protein to balance out the fruit. I keep a bag of apples in the fridge specifically for this now because it’s the only way my grandkids eat fruit without complaining.
20. Stuffed French Toast Centers
Press a mini candy bar between two slices of bread before dipping in egg mixture and cooking like regular French toast. The candy melts inside and creates a surprise filling that turns basic breakfast into something special without buying anything extra. One candy bar per sandwich is plenty, and you’re using up Halloween leftovers instead of leaving bread in the freezer. The chocolate oozes out slightly when you cut into it, which makes weekend breakfast feel more impressive than the 10 minutes of effort it took. Reese’s cups work best because peanut butter and maple syrup pair better than you’d expect.
21. Rice Krispie Treat Mix-Ins
Those traditional Rice Krispie treats get more interesting when you stir chopped candy into the marshmallow mixture before pressing into the pan. The recipe already calls for butter and marshmallows that come in at about $4 total, and your leftover candy replaces the boring version everyone’s had a million times. Chop up about 10-12 fun-size bars and fold them in right before spreading the mixture. M&Ms add color, chopped Snickers create caramel pockets, and the finished treats look more expensive than the ingredients cost. Cut them into squares and wrap individually for lunch box surprises that get eaten. My neighbor asked for the recipe after her kids came home raving about the ones I sent to school.
22. Candy Crust for Cheesecake
Crush candy bars in a food processor and mix with melted butter for a cookie crust alternative that uses up your Halloween stash. The crust comes together with about 15-20 fun-size bars and 4 tablespoons of butter, pressed into a pie pan before adding your filling. This works for Thanksgiving when you have leftover Oreo-type candies, and guests can’t figure out what makes the crust taste so good. It bakes up crunchy and sweet, saves you from buying graham crackers for around $4, and works with cheesecake, chocolate pie, or peanut butter filling. Just process the candy until it’s fine crumbs so the crust holds together properly.
23. Candy-Studded Banana Bread
Push mini candy bars into the top of banana bread batter right before baking for chocolate chunks that melt into the finished loaf. This clears out candy faster than snacking does, and you’re already making banana bread to use up brown bananas anyway. The candy sinks slightly during baking and creates these pockets of melted chocolate throughout slices that make plain banana bread more exciting. Use 8-10 mini bars per loaf, which costs nothing since it’s candy you’re trying to finish, and the bread stays moist for days. Reese’s cups add peanut butter flavor, while plain chocolate bars create a classic combination everyone recognizes.
Your Candy Bowl Just Solved Your Snack Budget
That giant bowl of Halloween candy doesn’t have to mock you from the counter anymore. You bought groceries this week, and throwing away food that could save you money feels wasteful. Because it is wasteful.
Start with freezing for emergency baking if you want free ingredients through December, try trail mix when you need snacks that cost less than store-bought, or make pancake mix-ins this weekend when your kids need something special. Every chopped Milky Way that goes into brownies instead of the trash is money you don’t spend later. You just turned Halloween excess into Christmas baking supplies, after-school snacks, and weekend treats without spending another dollar.